Nekocut
Welcome!
I have been editing videos for years and was annoyed that video editors: hold my edits hostage unless I upgrade, put a watermark on my videos, limit me to two video tracks, or are stupid expensive!
So I made Nekocut: a free video edit that doesn't do those things.
There is a paid tier. I loved editing on lots of devices with friends and I figured others might too - but it costs me money.
So there you have it. A free video editor without watermarks that doesn't hold your work hostage.
If you are a company and want company-like stuff... shoot me an email.
How editing works
Nekocut is a non-destructive, keyframe-driven editor. An imported file remains an original in the Media panel; clips on the timeline are editable views of that source. Moving, trimming, splitting, retiming, filtering, or deleting a clip changes the project, never the source file.
Tracks decide how those clips meet. Higher video tracks draw over lower ones, while audible tracks mix together. The playhead, preview, and final export read the same clip settings and keyframe curves, so the timeline is not a rough instruction for a separate renderer: it is the edit.
| Part | What it means |
|---|---|
| Media item | An imported source file. It can be used by more than one clip. |
| Clip | A placed and trimmed use of media, a title, or a shape. |
| Track | A video layer or audio lane. Track controls affect everything on that row. |
| Envelope | A colored line across a clip showing one property over time. |
| Keyframe | A value pinned to a particular moment on an envelope. |
| Group | A movable, resizable bar holding related keyframes written together. |
| Skip | A timeline range playback and export jump over without cutting every clip. |
| Transition | A controlled overlap between two neighboring clips. |
Most changes are envelopes
Volume, opacity, zoom, speed, scale, position, rotation, and filter strength all use the same model. With no keyframes, the envelope is a flat value for the whole clip. Add keys and Nekocut moves between their values, either in straight lines or with Ease. The keys stay attached to their moments in the source, so they travel with the footage through normal moves, trims, and splits. A speed change is the one edit that changes the clip's own length, and there every envelope on the clip is refit into the new length: the keys keep the spacing and shape you gave them, at the same points along the clip, so nothing ends up past its edge.
Shift snaps a slider
Hold Shift while dragging any value slider — or any keyframe dot or envelope line — and the value lands on that control's own round numbers instead of wherever the pointer is. The step belongs to the quantity being set, not to the slider: 15° on rotation, 25% on a percentage such as volume, opacity, filter strength, or a green-screen amount, a quarter of a multiplier such as zoom, scale, speed, or title size, and 4 px on a shape's outline width. Let go of Shift and the control goes back to following the pointer exactly.
Automations write editable work
Fades, ducking, Handheld and Impact shake, Ken Burns, motion tracking of shapes and text, wide fill, and two-clip arrangements are not sealed effects with a hidden result. They write the same ordinary keyframes used by hand and leave a receipt on the Groups rail when a timed section needs one. You can move or resize the group, then adjust individual keys. Turning a writer off removes the work it generated without removing unrelated keys.
One project, two interfaces
Desktop, iPad, and phone use the same project data, playback engine, and export. The phone interface is deliberately different: the desktop inspector becomes a pill of tool icons in the bottom bar, the chosen tool's controls open in a card above the timeline, and Media and Comments become drawers. The location and gestures change; the edit itself does not.
Support
| Need | Do this |
|---|---|
| How-to help | Open ? in the editor and ask a question. |
| Report a problem | Describe what happened and what you expected. Add a screenshot when useful. |
| Project help | Include the project name and the clip or control involved. |
| The front page | Choose File ▸ About Nekocut. It opens in a new tab. |
Importing media
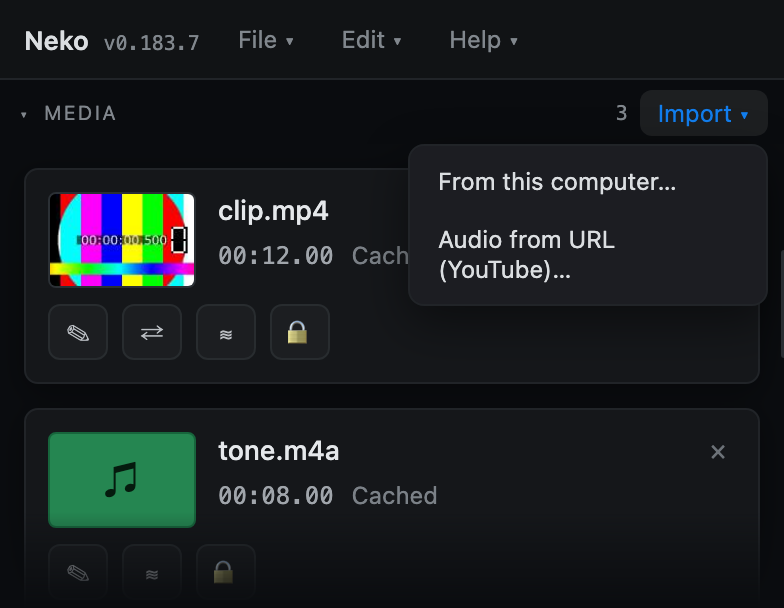
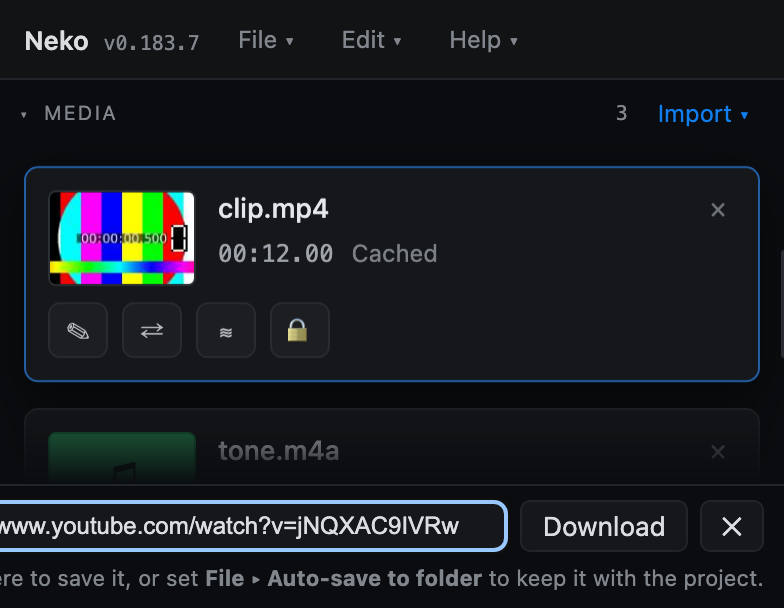
Drag files into the editor or select Import.
| Import | Result |
|---|---|
| Video, audio, images | Added to Media. Drag an item to the timeline to use it. |
| Subtitle files | Imported as captions when the format is supported. |
| Project file | Opens the project and asks for any missing media. |
| Folder | Imports supported files from the selected folder. |
| Media control | What it does |
|---|---|
| Drag | Adds the item at the drop position. |
| Double-click | Previews the item. |
| Relink… | Reconnects one missing source file. |
| Reconnect files | Restores access to known files after browser permission expires. |
| Locate files… | Searches for media that is genuinely missing. |
| Download original | Downloads one synced original to this device now. On a computer, once every preview copy is here, originals also download in the background, paused whenever something else needs the connection. |
| Sync Source | Chooses which files send their preview copy and original to the cloud. |
- Relinking matches file content, so renaming or moving a file is fine.
- When a project opens with missing media, one prompt offers Reconnect (Chrome, for files this browser has opened before) or Locate files… (select all the missing files in one picker).
- If an iCloud file says it is not downloaded, choose Download Now in Finder, then import it again.
- Apple Photos in Chrome: hold Option while dragging. A Live Photo arrives with its motion component, which Nekocut imports as a video while ignoring the duplicate still. Safari accepts a normal drag.
- Preview copies keep a project editable but are not used for final export.
Timeline basics
| Action | How |
|---|---|
| Select | Click a clip. Shift-click adds or removes clips from the selection. |
| Move | Drag clips. Snapping aligns edges and the playhead. |
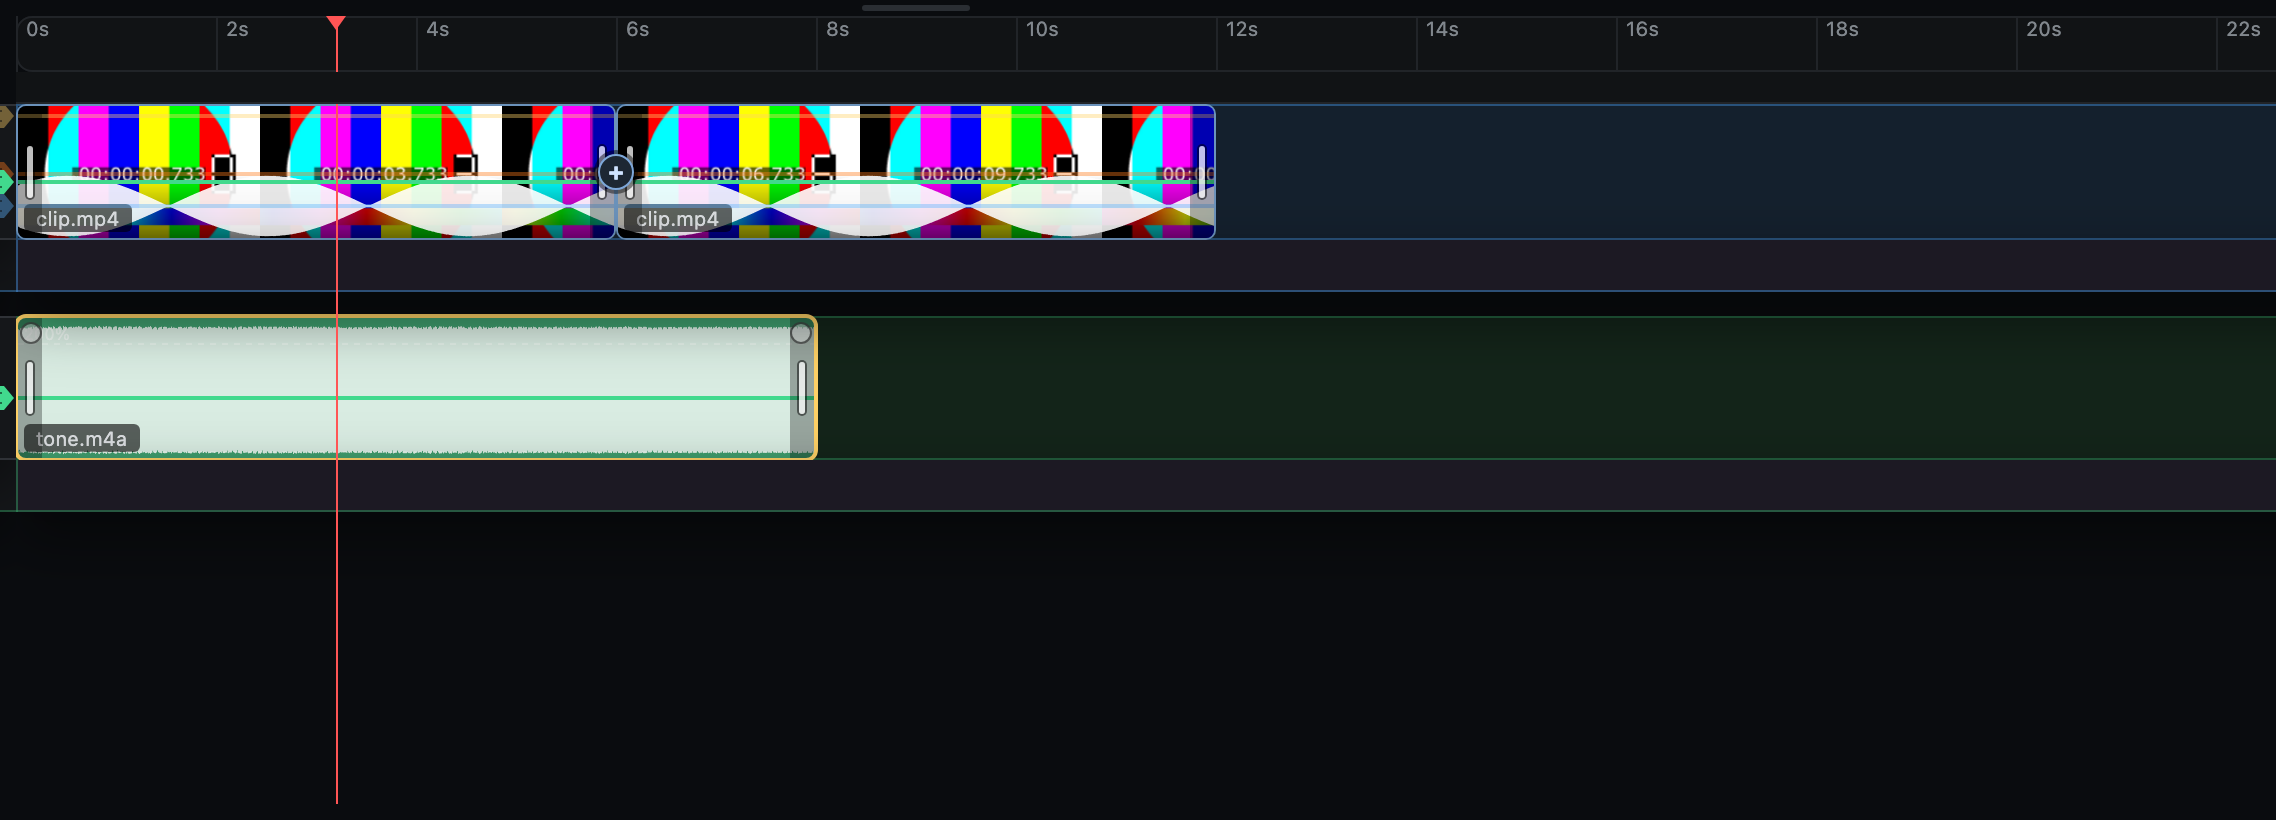
| Insert between clips | Drag a clip over a neighbour. A line marks the join it will go into; release to drop it there. |
| Re-order a row | Keep pushing, further into the neighbour, and the row zooms out into cards. Slide the card you are holding to any slot and release. |
| Trim | Drag either clip edge; the cursor changes to a resize arrow and only that clip's edge lights. A keyframe at the edge sits just inside it and is dragged instead wherever its dot is; a key whose moment falls in the gap between two clips is drawn hollow at the edge, on its line. |
| Split | Place the playhead, then press S or use Split. |
| Delete | Select clips and press Delete. |
| Duplicate | Use copy/paste or hold Option while dragging. |
| Zoom | Pinch, use the zoom control, or scroll with the modifier shown in the editor. |
| Undo / redo | ⌘ Z / ⇧ ⌘ Z. |
| Play / pause | Space. |
Track controls
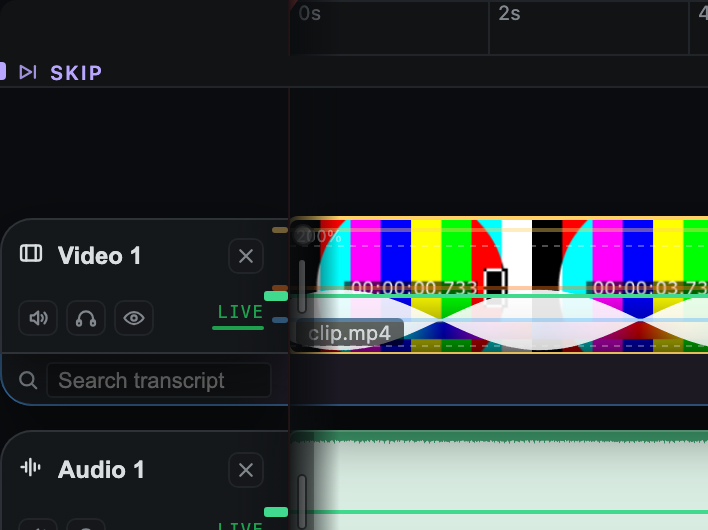
| Control | What it does |
|---|---|
| Eye | Shows or hides a video track. |
| Speaker | Mutes or unmutes an audio track. |
| Lock | Prevents accidental edits on the track. |
Track headers rest narrow, showing just each row's icon. Click any header to open the whole column — names and switches for every row. Once open, click anywhere on a row, its title included, to jump that row's playhead to its next clip, wrapping to the first once you pass the last; double-click to rename the row instead. Clicking elsewhere on the timeline closes the headers again.
The line and the cards do different things. The line places one clip at that join and pushes the rest of the row along, leaving open the gap the clip came from. The cards re-order the row instead: the same clips in a new order, in the row's existing slots, with no gap left behind. Pull back out of the neighbour and the cards stand down and the line returns, so you can change your mind mid-drag. Either way, one ⌘ Z undoes the whole drop. Dragging down to the red band still deletes the clip, cards or no cards.
Most clip settings appear in the inspector after you select a clip. Selecting several clips applies compatible changes to all of them.
Add a track, title, or shape from + under the last track header.
Comments & review
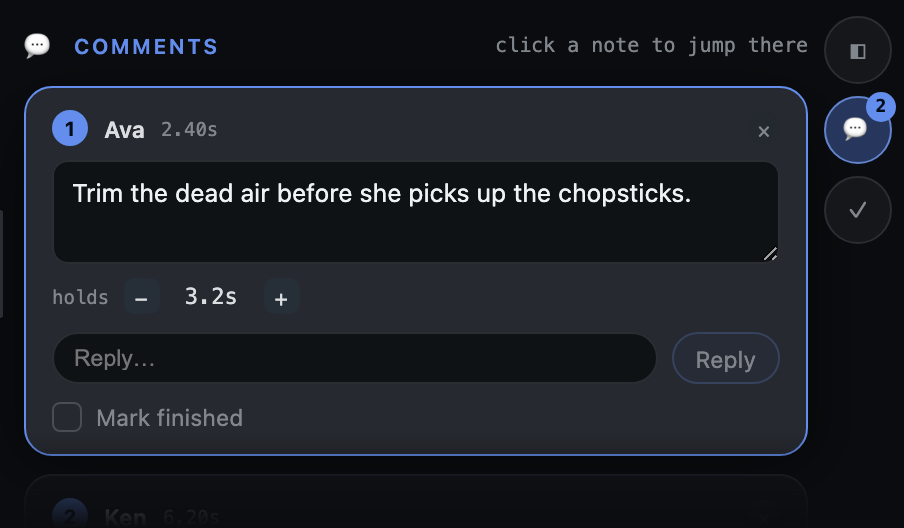
- Move the playhead to the frame you want to discuss.
- Select Comment, write the note, and post it.
- Reply, resolve, reopen, or delete from the comment thread.
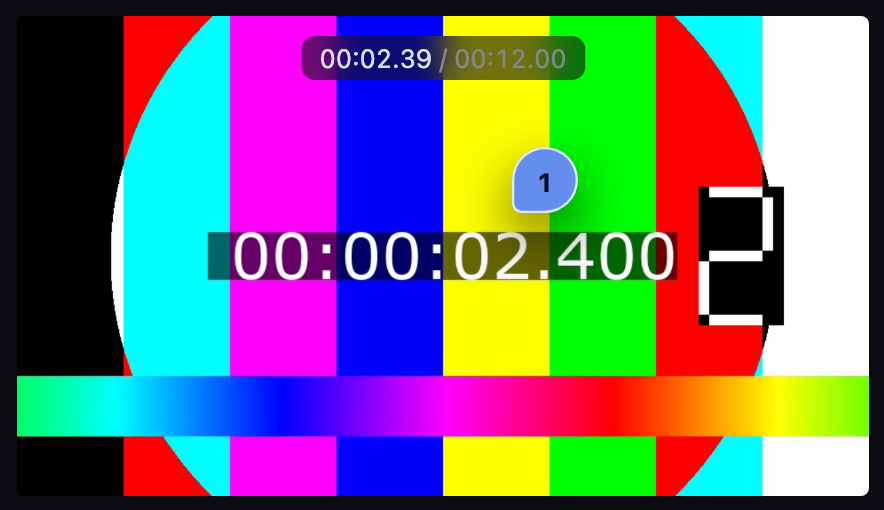

Shared reviewers can comment without changing the edit. Comments remain attached to their timeline time.
iPhone & iPad
Mobile is a touch-first version of the editor, not the desktop layout compressed into a smaller rectangle. It opens the same projects and offers the same editing model, but it spends the screen differently and replaces mouse hover with visible labels and deliberate gestures.
Phone layout
| Area | On a phone |
|---|---|
| Orientation | Hold the phone upright. The preview runs down to the bottom bar and the tracks float over its lower edge — the row you are on is full height and the others rest as thin strips. Turned sideways, the editor asks you to turn the phone back; the iPhone app stays upright on its own. |
| Bottom bar | Play at the left, the tools for the selected clip as a pill of icons in the middle (Clip, Green screen, Auto-skip, Keyframes, and others as they apply), and + at the right, which adds a track, title, or shape. There is no zoom button: pinch the tracks to zoom. |
| Tool controls | Select a tool and its controls open in a card that floats over the preview just above the tracks. Tap the tool again to close it. |
| Keyframes | Opens the channel with the most existing work, or the first channel on an untouched clip. The card's title is the channel: tap Rotation ^ (or whichever channel is showing) to list every channel this clip has, each in its line colour; a channel that already has keyframes or a changed value is tinted and carries a dot. Beside the title, ◀ 2/2 ▶ steps between keys and shows which key you are on, and + | − adds a key at the playhead or removes the key the playhead is on — the one that does nothing where you are is dimmed. The row below is the value slider, the value (tap it to type one), and the ease toggle. |
| Channel extras | The v at the end of the value row, right of the ease toggle, opens what the card has no room for: that channel's extra rows — duck under speech and fades on Volume, fades on Opacity, outline and shadow for a picture-in-picture, shake and tracking on Position and Scale — with Reset, and Remove filter on a keyed filter. On a channel with nothing there but Reset (Zoom on a title or shape, Speed, Rotation, an unkeyed Filter), the value row ends in the word Reset instead. Either appears only when there is something to show. |
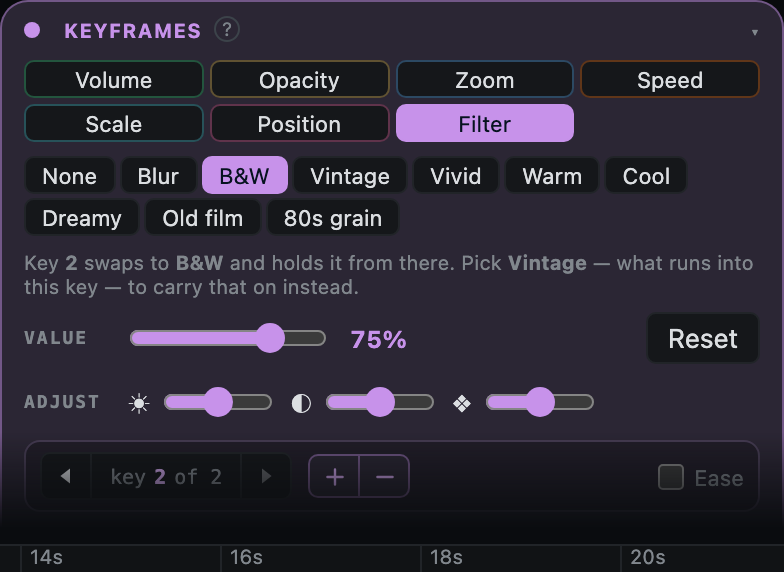
| Filter | Looks are small previews of the clip in a sideways strip, with the chosen look's name next to the title; None is the first preview. Brightness, contrast, and saturation are three short sliders on one row, and the last row is the filter's strength. |
| Time | There is no numbered ruler. Seconds are faint ticks on the clips, and the skip bar above the tracks is ticked every fifth of a second with a taller tick each second. Hold the skip bar and drag to make a skip. The preview's timecode shows the exact time. |
| Media | The filmstrip button opens a drawer from the left. Close it with the same button or return to the timeline. |
| Comments | Open and finished notes live in a drawer from the right. Closing the drawer does not automatically end note-placement mode; the chip on the preview shows when that mode is still active. |
| Track headers | The header column travels with the start of the film, then docks at the left and shrinks to media-type icons; it also rests shrunk this way anywhere else in the film. Tap any header to open the whole column — names and switches for every row. Once open, tap anywhere on a row, its title included, to jump that row's playhead to its next clip, wrapping to the first; double-tap to rename the row instead. Tap elsewhere on the timeline to close the headers again. |
Touch grammar
The timeline distinguishes a finger that stays still from one that starts moving. This keeps ordinary navigation available even when the finger begins over a clip, key, or skip.
| Gesture | What it does |
|---|---|
| Tap a clip | Selects the clip and updates the tools in the bottom bar. |
| Move immediately | Pans or scrubs the timeline; it does not pick up the item underneath. While playing, playback waits, silent, until the film stops, then plays on from there. |
| Hold, then drag | Moves a clip or manipulates the handle, keyframe, skip, or group beneath the finger. The preview needs no hold: drag a picture, title, shape, note pin, or any of their grips straight away, and a tap only selects. |
| Pinch | Changes timeline zoom. |
| Swipe a card sideways | The cards sit side by side, with the one before and after showing at the edges. Swipe, or tap an edge, to move to the next or previous tool, and within Keyframes to the next or previous channel, in the order the bottom bar and the channel list show them; a quick flick passes several. A swipe on a slider, a text field, the automation row, or an open automation's controls works that control instead. |
| Tap a key | Selects that exact keyframe and opens its channel controls. |
| Tap or double-tap a skip | A tap on the skip's bar selects it; a double-tap removes it. |
| Tap, hold, or double-tap a cut | A tap opens the transition already there; a hold or double-tap adds one at a bare cut (the faint dissolve mark between two clips). A double-tap on the selected transition removes it. |
| Hold a handle | A selected clip shows a handle outside each of its ends; hold one and drag to trim. |
| Tap or double-tap a group | A tap on the group's bar selects it and opens its card; a double-tap removes it. |
| Tap the mark between two tracks | Where a clip on top starts or ends over the one beneath, turns the transition at that end on (a Cross-dissolve, with Two clips and its transition panel opened) or off. While the playhead is over two overlapping clips, Two clips is also offered in the bottom bar. |
Moving and re-ordering clips
Hold a clip until it lifts, then carry it. Near a seam, the insertion line shows where it will land and later clips move aside. Push farther into a neighboring clip and the row changes into cards: move the held card to a new slot to re-order the row without leaving a gap. Pull back to return to seam insertion. Either drop is one undo step.
iPad and Home Screen mode
- iPad: uses the full multi-column editor in either orientation, with touch-sized targets where needed. A keyboard and trackpad are optional.
- iPhone and iOS: choose Share → Add to Home Screen to recover the space used by Safari's browser bars. It is the same local project storage.
- Keep the browser open and the device awake during large imports and exports. Long renders are usually faster and cooler on a computer.
Keyframes & envelopes
A keyframe says “at this moment, this property has this value.” Nekocut draws the values as a colored envelope across the clip and uses that same curve for the preview, audio mix, and export. Before the first key the first value holds; after the last key the last value holds.

Available channels
| Clip kind | Channels |
|---|---|
| Video | Volume, Opacity, Zoom, Speed, Scale, Position, Rotation, Filter |
| Still image | Opacity, Zoom, Scale, Position, Rotation, Filter |
| Title | Opacity, Position, Rotation |
| Shape | Opacity, Position, Rotation, Scale |
Each channel has its own color. A chip gains a dot and a light tint when that channel contains an edit; the active channel is filled. This makes it possible to see where work already exists without opening every curve.
Rotation
Rotation turns the picture, title, or shape clockwise, and it is measured in degrees. Choose Rotation and the preview grows a ↻ grip; the pointer becomes a rotate cursor over it, and dragging it turns the item about its center. The slider and the exact-value field next to it set the same angle.
On a picture the grip sits in the bottom-right corner of the frame, in the same place the resize square uses, and the resize square steps aside while Rotation is the chosen channel — so the grip is reachable even when the clip fills the whole preview. It stays inside the preview as the picture turns. On a title or a shape the grip floats just outside the box, above it or below it depending on which side has room.
Values past 360° keep going, and that is deliberate. The angle is never folded back into a single turn, so 720° is two complete turns and 1080° is three: dragging the grip round and round keeps counting up rather than snapping back to 0°. Two keyframes are joined by the plain difference between their numbers, so a key at 0° followed by one at 720° spins twice, and a key at 350° followed by one at 370° moves forward 20° instead of taking the long way back. Negative values turn counter-clockwise the same way. Type any angle you like into the value field — the slider's track widens to hold it.
Hold Shift on the grip, on a keyframe dot, on the envelope line, or on the slider to snap to 15° steps. Snapping counts past a turn as well: 705° and 720° are stops in exactly the way 15° is, so a multi-turn spin never gets folded back into a single turn by snapping to it.
Make an animation
- Select a clip and open Keyframes.
- Choose the property channel. Its envelope appears across the clip.
- Move the playhead to the first moment and use + to add a key. On desktop, you can also double-click the envelope.
- Change the value with the slider, exact-value field, or preview handle.
- Move to another moment, add another key, and set its value. Nekocut draws and plays the change between them.
On desktop, double-clicking a line away from existing keys creates a four-key working section, spaced one second apart, plus a bar on the Groups rail. Hold ⌘ while double-clicking when you want only one key. The inspector's + normally adds one key at the playhead.
Keyframe controls
| Control | What it does |
|---|---|
| Envelope line | With no keys, drag it to set one value for the whole clip — it changes the clip's own setting rather than creating a keyframe. Works on every channel, Rotation included. On phone, hold before dragging. |
| Keyframe dot | Drag vertically to change its value and horizontally to change its time. Keys cannot cross their neighbors. |
| Channel chips | One chip per channel the clip has. A channel that already has keys or a changed value is tinted in its colour and carries a dot. On a phone the card's title is the channel list instead. |
| ◀ n/m ▶ | Selects the neighboring key, moves the playhead there, and reveals it in the timeline. The count says which key you are on, or “no keys”. |
| + | − | + adds a key at the playhead using the value already on the curve, so the image or sound does not jump; it is dimmed when the playhead is already on a key. − removes the key the playhead is on and hands selection to the next one; it is dimmed between keys. |
| Ease | The curve button beside the value. Switches the channel between straight interpolation and smooth ease-in/out. |
| Automation row | The card's last row: one tile per writer the channel has, which you swipe sideways — on a computer, scroll it with the wheel or trackpad, drag it, or use the arrows at its ends. A tile that is off shows just its name; one that is on lights up and shows its setting, such as 100% · 5.0s. Follow the shot shows no footage in amber when there is nothing under the picture to follow. Tap a tile and its controls slide in from the right in the same space; ‹ slides back. The card is only as tall as what it holds: a channel with no writers, such as Speed or Rotation, is just the title and the value, and the row is slimmer while nothing in it is on. While any card is open on a portrait phone, the timeline steps back — its rails and the rows you are not editing shrink to thin lines — and returns when the card closes. |
| Reset | Removes that channel's edits and returns it to its normal static value. It is always at the end of the value row, and only appears once there is something to reset. |
| Group bar | Moves a run of keys together, stretches their timing from either edge, or removes that generated section. |
- Desktop: double-click a dot to delete it. Hold Shift while dragging to snap the value to that channel's own step and the time to keys on other channels.
- Phone: tap a dot to select it and open that key's channel; hold it to move it. The value appears beside the key and inside the magnifier while dragging.
- A newly added key copies the curve's current value. Adding it alone should not visibly change the clip.
- Keyframes belong to source moments, so moving and retiming a clip carries the animation with its footage.
Every channel and automation
These are the same words the ? on each card shows for whatever it is showing: the channel, the automation whose settings are open, or the tool. On a computer, point at the ?; on a phone, tap it. Nothing is written on the picture itself.
| Name | Kind | What it does, and how to use it |
|---|---|---|
| Volume | Channel | How loud this clip plays, from silent to 200%. Set it with the slider; add keys with + to change it over time, and drag them on the clip’s line. |
| Opacity | Channel | How see-through the picture is. At 0% it is invisible and the track below shows. Set it with the slider; keys fade it over time. |
| Zoom | Channel | Crops into the frame. Raise the slider above 1×, then drag the box on the picture to aim where it looks. Each key keeps its own aim, so two keys make a pan; the small map shows the crop in the full frame. |
| Scale | Channel | How big the whole picture is on the canvas — a picture-in-picture’s size. Drag the corner handle on the picture, or use the slider. |
| Position | Channel | Where the picture, title or shape sits. Drag it on the picture, or type X and Y. Keys at two moments make it travel between them. |
| Rotation | Channel | Turns a title or shape. Drag the ↻ grip above it on the picture (hold Shift for 15° steps), or use the slider. |
| Speed | Channel | How fast the footage plays. Above 1× is faster and the clip gets shorter; below 1× is slower. Keys ramp the speed, and the clips after it move to fit. |
| Filter | Channel | A colour look over the clip. Pick a look from the thumbnails; the slider sets its strength. With keys, a look picked at a key starts there. |
| Duck | Automation | Lowers this clip wherever another track is speaking. Set how low it dips and how fast; the dips are ordinary volume keys you can drag. |
| Fade in | Automation | Fades the clip in from its start — the picture, the sound, or both. Set the length here, or drag the inner end of its bar on the Groups rail. |
| Fade out | Automation | Fades the clip out at its end — the picture, the sound, or both. Set the length here, or drag the inner end of its bar on the Groups rail. |
| Ken Burns | Automation | A slow push in with a gentle pan across the whole clip: two zoom keys and one bar on the Groups rail. Stretch the bar to change how long it runs; drag the box on the picture at either key to aim it. |
| Frame | Automation | An outline and a drop shadow for a picture-in-picture. Turn either on; pick the outline’s colour beside it. |
| Handheld | Automation | A drifting, hand-held camera. It writes shake keys under one bar on the Groups rail — stretch the bar to change how long. The slider sets how hard; the dots jump to the bar and to each channel it wrote. |
| Impact | Automation | One hard jolt, as if the camera were hit. One bar on the Groups rail to move or stretch; the slider sets how hard; the dots jump to the bar and its channels. |
| Stabilize | Automation | Steadies a shaky shot: it measures the camera’s shake across the whole clip and writes position keys that cancel it, zooming in just enough to hide the moving edges. Pans and slow drifts stay. The slider sets how much of the shake it takes out; the tile says what that costs in zoom. |
| Follow the shot | Automation | Makes this item travel with whatever is under it. Stop where you can see the thing, drag the item onto it on the picture, and turn this on. Move the item later to re-track from there. |
| Adjust | Automation | Brightness, contrast and saturation of the look. The middle of each slider leaves it unchanged. |
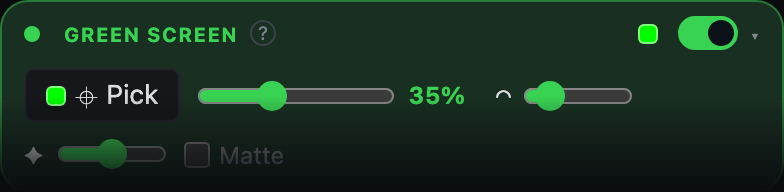
| Green screen | Tool | Knocks one colour out so the track below shows through. Press Pick, then press the screen colour on the picture. ≈ widens the range of colour removed, ◠ softens the edge, ✦ takes the screen’s colour off what is kept. Matte shows what stays (white) and goes (black). |
| Auto-skip | Tool | Leaves the quiet stretches out of the finished video. The slider is the silence level; quiet for is how long a pause must last; keep gives time back at each end. Skip words cuts the words you list, once the clip is transcribed. |
Zoom, Scale, and Position
| Channel | Use it for |
|---|---|
| Zoom | Looking into the source frame. Each zoom key can remember its own aim point, creating a pan-and-zoom camera move. |
| Scale | Changing how large the whole clip is on the project canvas, including picture-in-picture size. |
| Position | Moving the clip, title, or shape around the canvas. Its X and Y values animate together. |
Writers and special channels
Writers are the tiles in the card's automation row: Volume has Duck, Fade in and Fade out; Opacity has Fade in and Fade out; Zoom has Ken Burns; Scale has Frame, Handheld and Impact; Position has those three and Follow the shot; Filter has Adjust, followed by the looks. Speed and Rotation have none.
- Opacity and Volume: Fade in and Fade out each write a fade (opacity on a picture, volume on sound, both on video) and one bar on the Groups rail at that end of the clip. Drag the bar's inner end to change the length; removing the bar removes only the fade. Duck under speech writes volume keys.
- Position and Scale: Handheld and Impact write runs of shake keys under one bar on the Groups rail. Follow the shot writes Position keys that follow the footage under a shape, a title, an image or a picture-in-picture video.
- Zoom: Ken Burns writes a slow push in with a gentle pan across the whole clip: two zoom keys, one at each end, and one Ken Burns bar on the Groups rail. Stretch the bar to change how long the push runs; removing it takes out those two keys and leaves any zoom keys you added.
- Filter: the envelope controls strength. A ringed filter key can also switch to a different look—or to no look—from that moment onward.
- Speed: changing the curve also changes clip length, so later material ripples to keep the same source footage in the clip. The speed curve itself, and every other envelope on that clip, is refit into the new length.

Speed & retiming
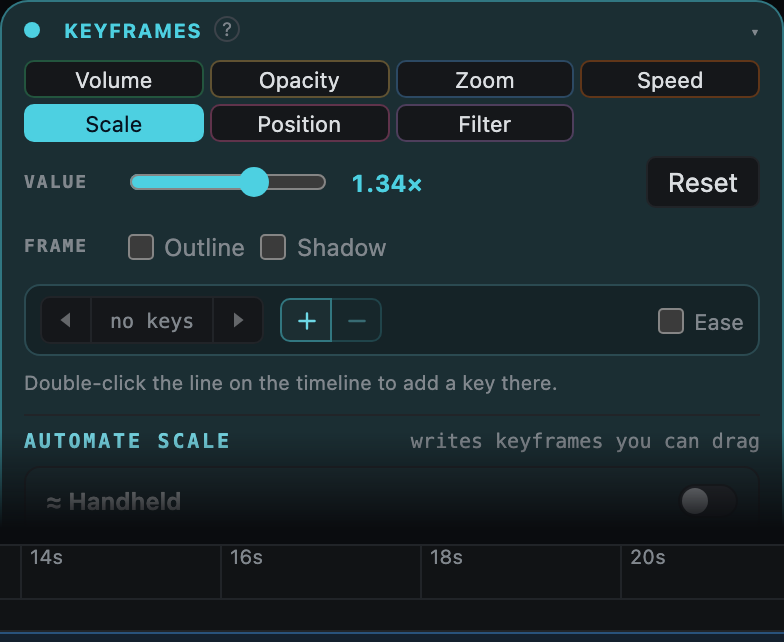
Select a clip, open Speed, then choose a preset or enter a value.
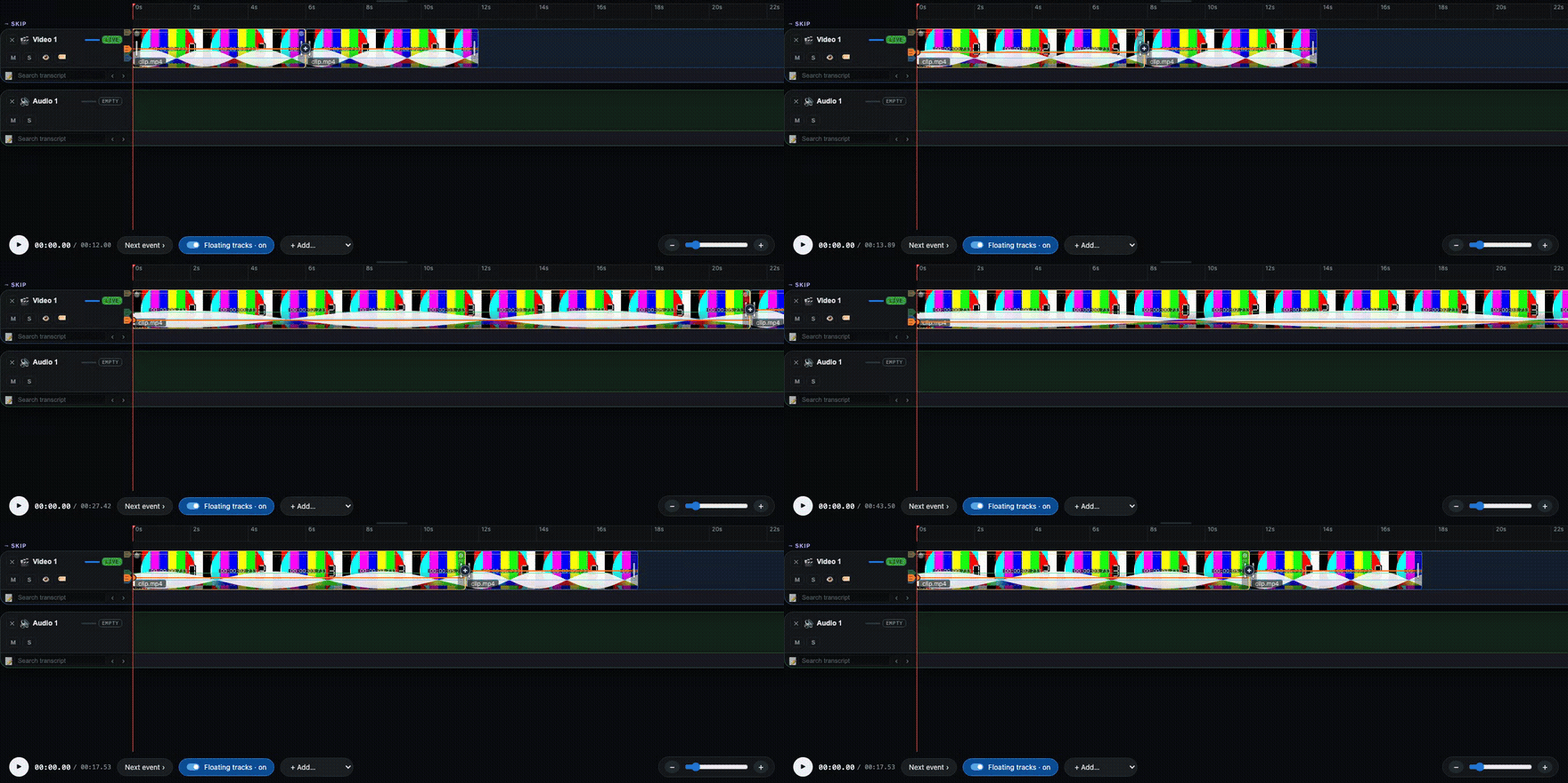
- Higher speed shortens the clip; lower speed lengthens it.
- Reverse plays the clip backward.
- Speed ramps use keyframes to change speed within a clip. The ramp you draw is the ramp that plays: the clip takes whatever length that curve needs, and the keys move with it rather than running off the end.
- Check the new clip duration before moving later edits.
Skips & auto-skip
Skips remove pauses or unwanted ranges without manually cutting each one.
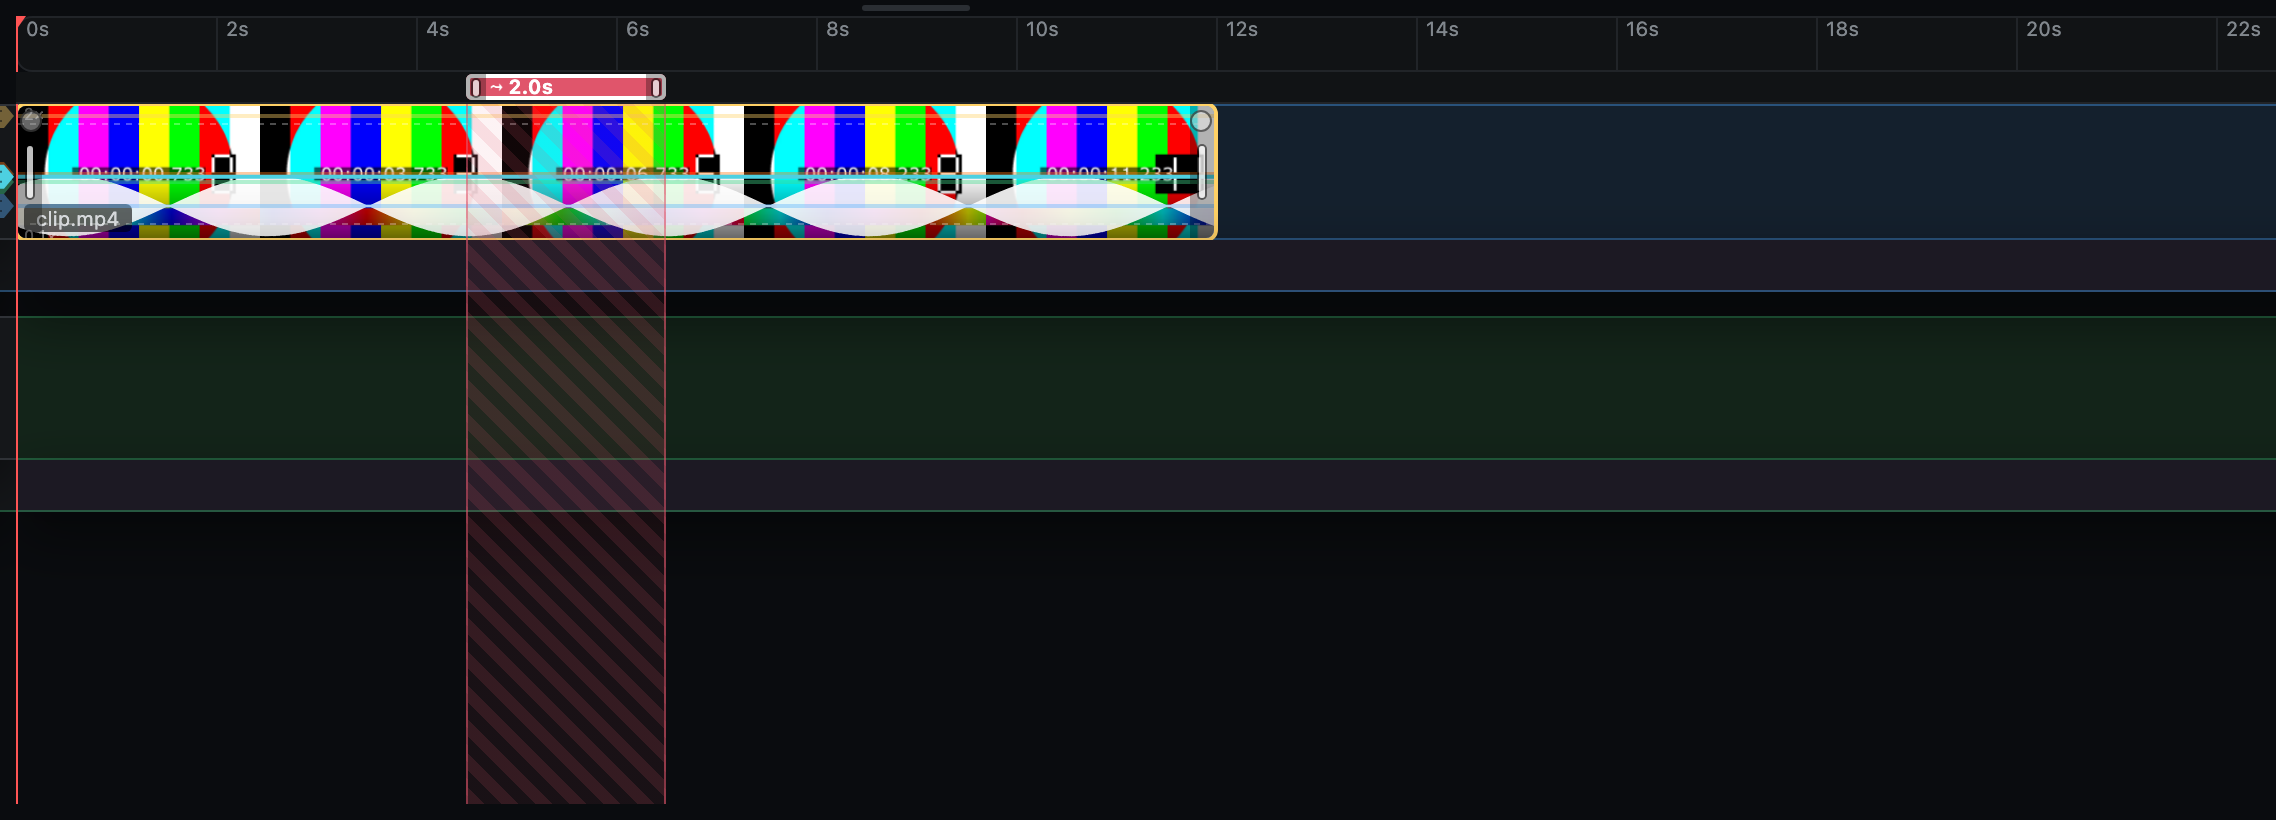
| Control | What it does |
|---|---|
| Add skip | Marks the selected timeline range to be skipped. |
| Auto-skip | Finds quiet sections and proposes skips. |
| Threshold | Sets how quiet audio must be to count as silence. |
| Minimum duration | Ignores pauses shorter than this value. |
| Padding | Keeps a little sound before and after speech. |
| Apply | Commits the proposed skips; undo remains available. |
Duck under speech
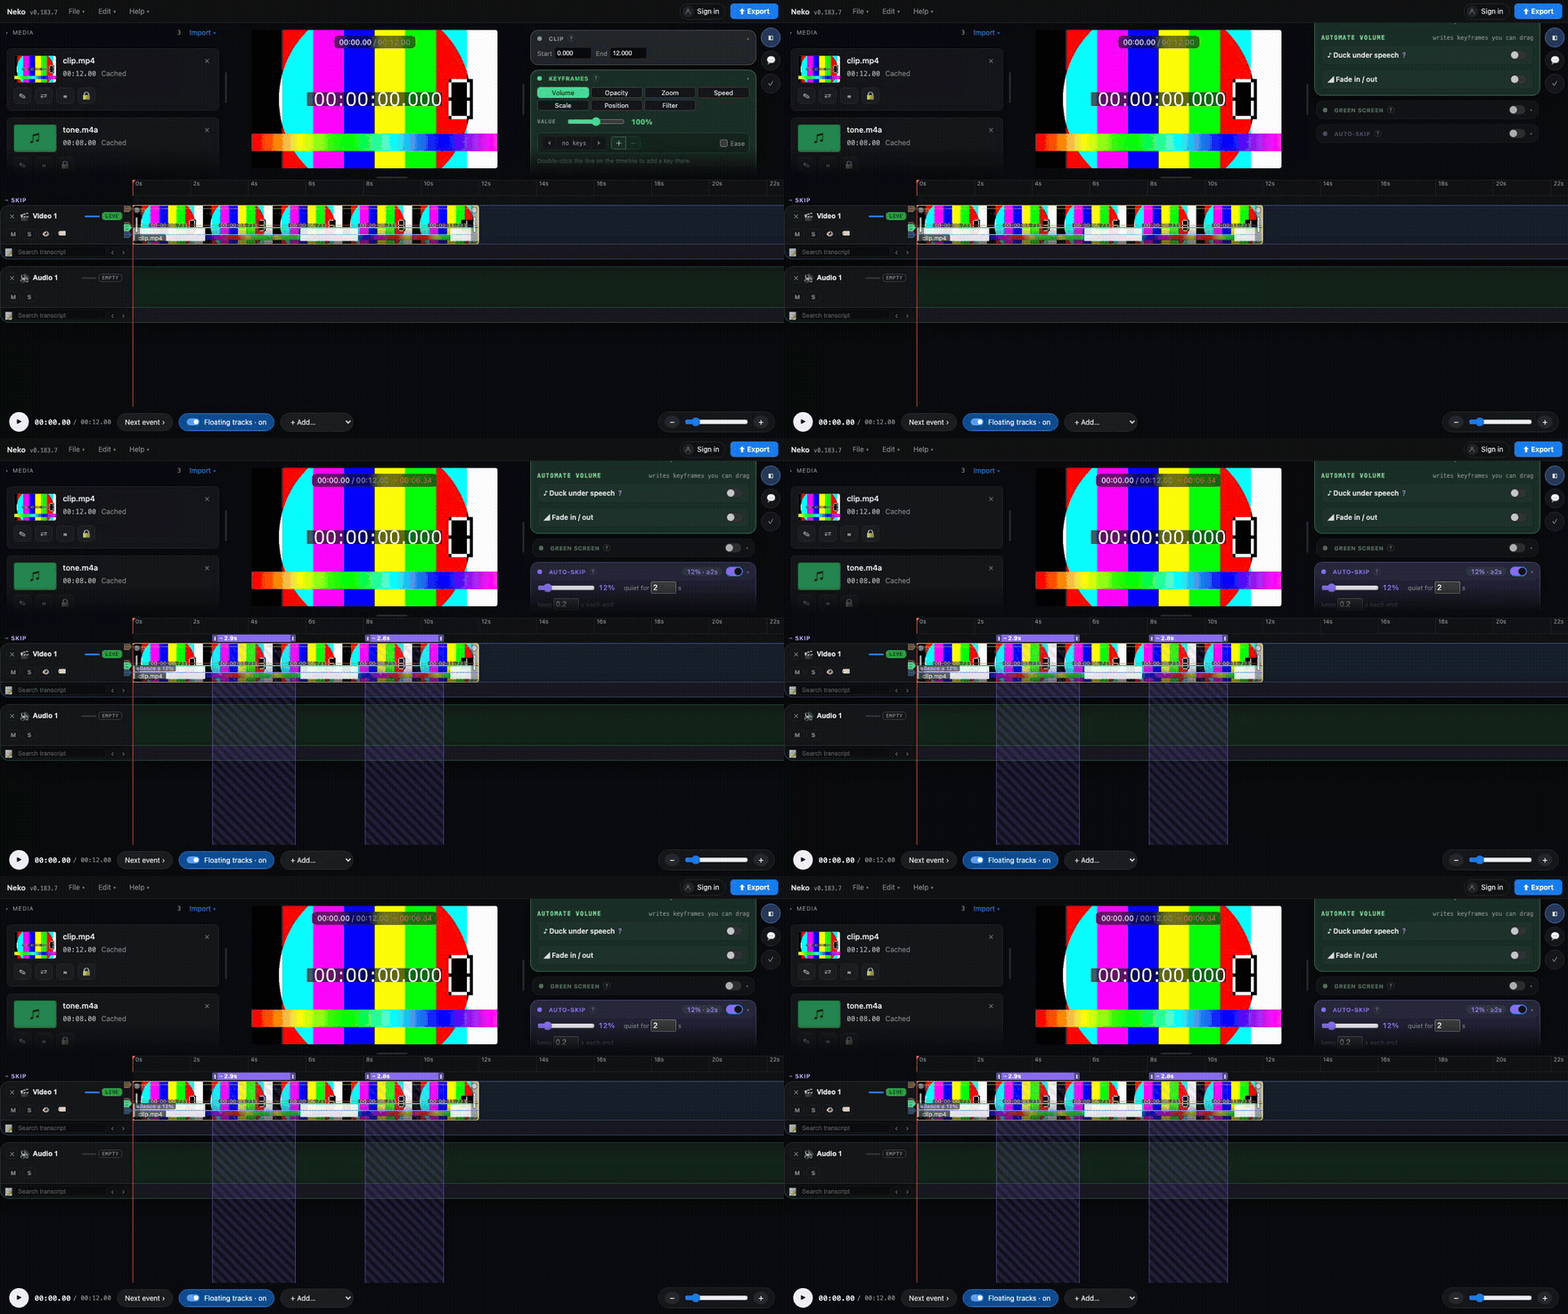
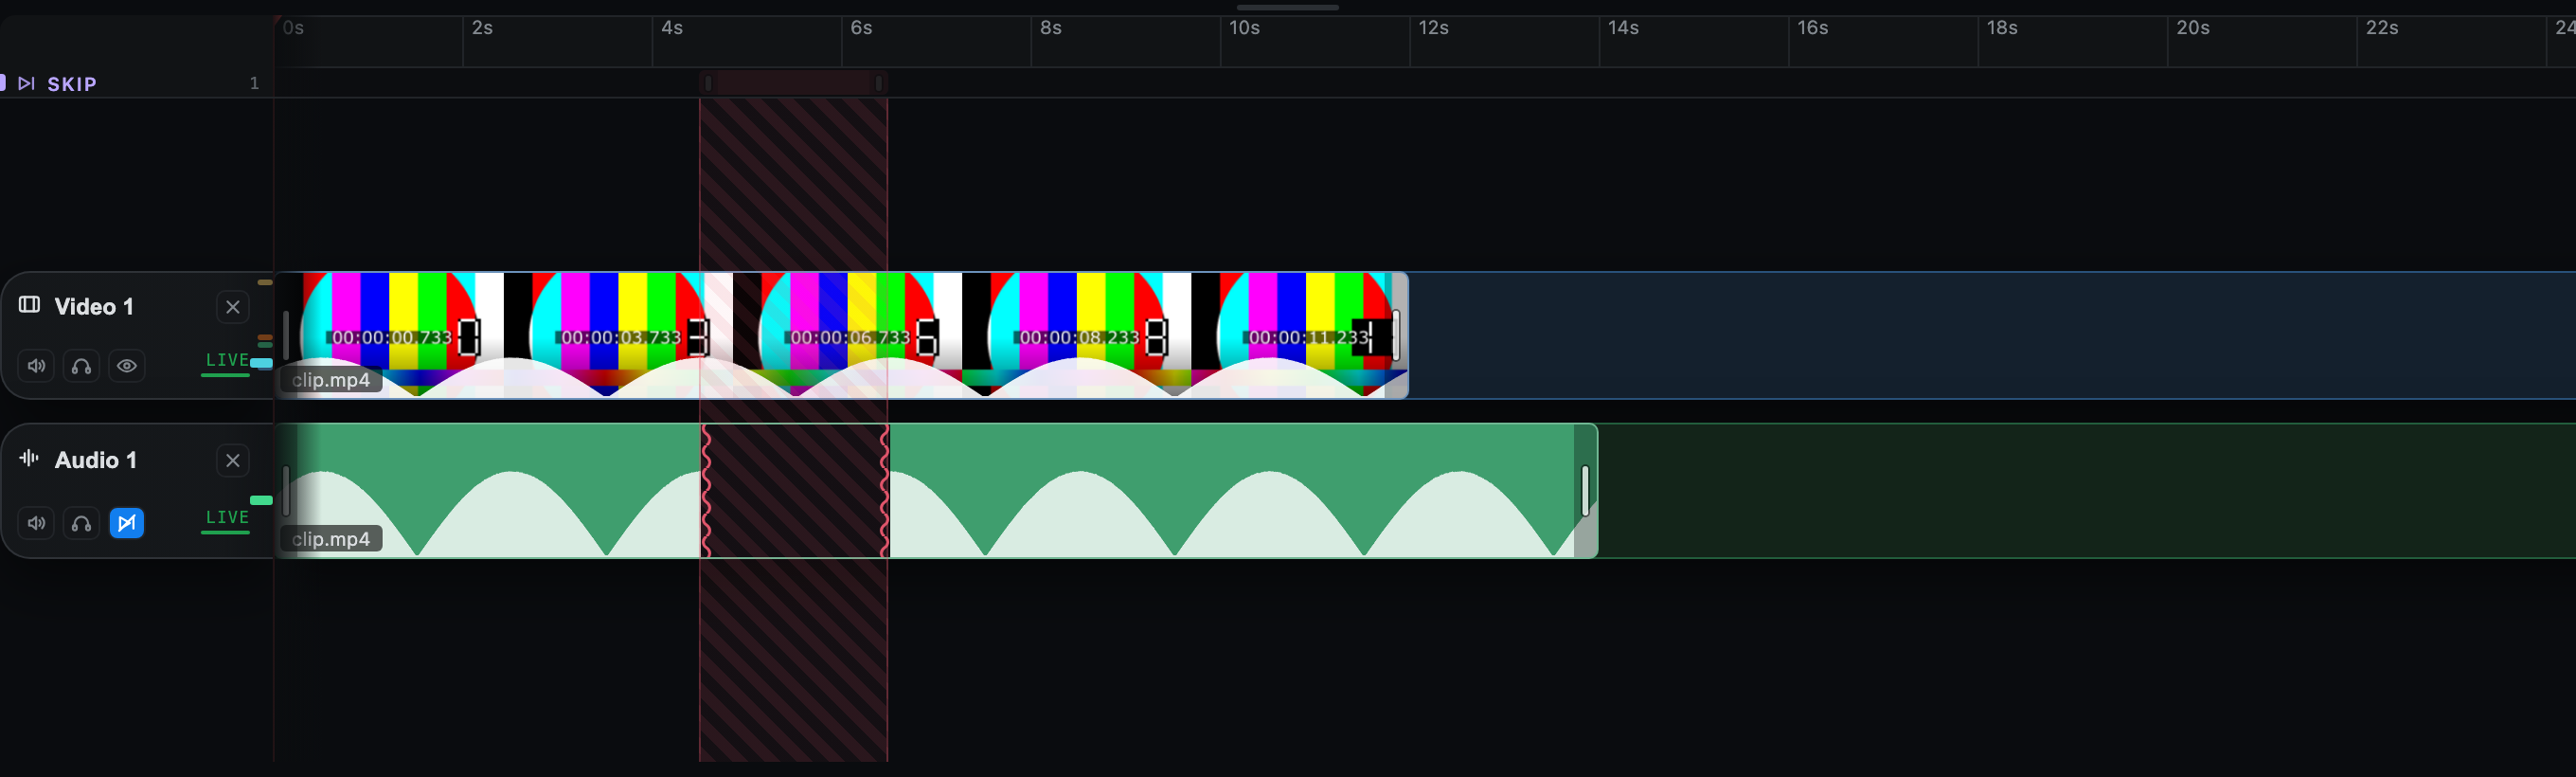
Automatically lowers music while dialogue is present.
- Select the music or background-audio clip.
- Choose Duck under speech.
- Set the reduced level, attack, and release.
Attack controls how quickly music drops. Release controls how quickly it returns.
Reduce noise
Select an audio clip and enable Reduce noise. Increase the amount until noise is lower without making speech sound metallic. Use headphones for fine adjustment.
Isolate voice Pro
Select a clip and choose Isolate voice to separate speech from background sound. Processing may take a moment. Keep the original when you may need to remix it later.
Transitions
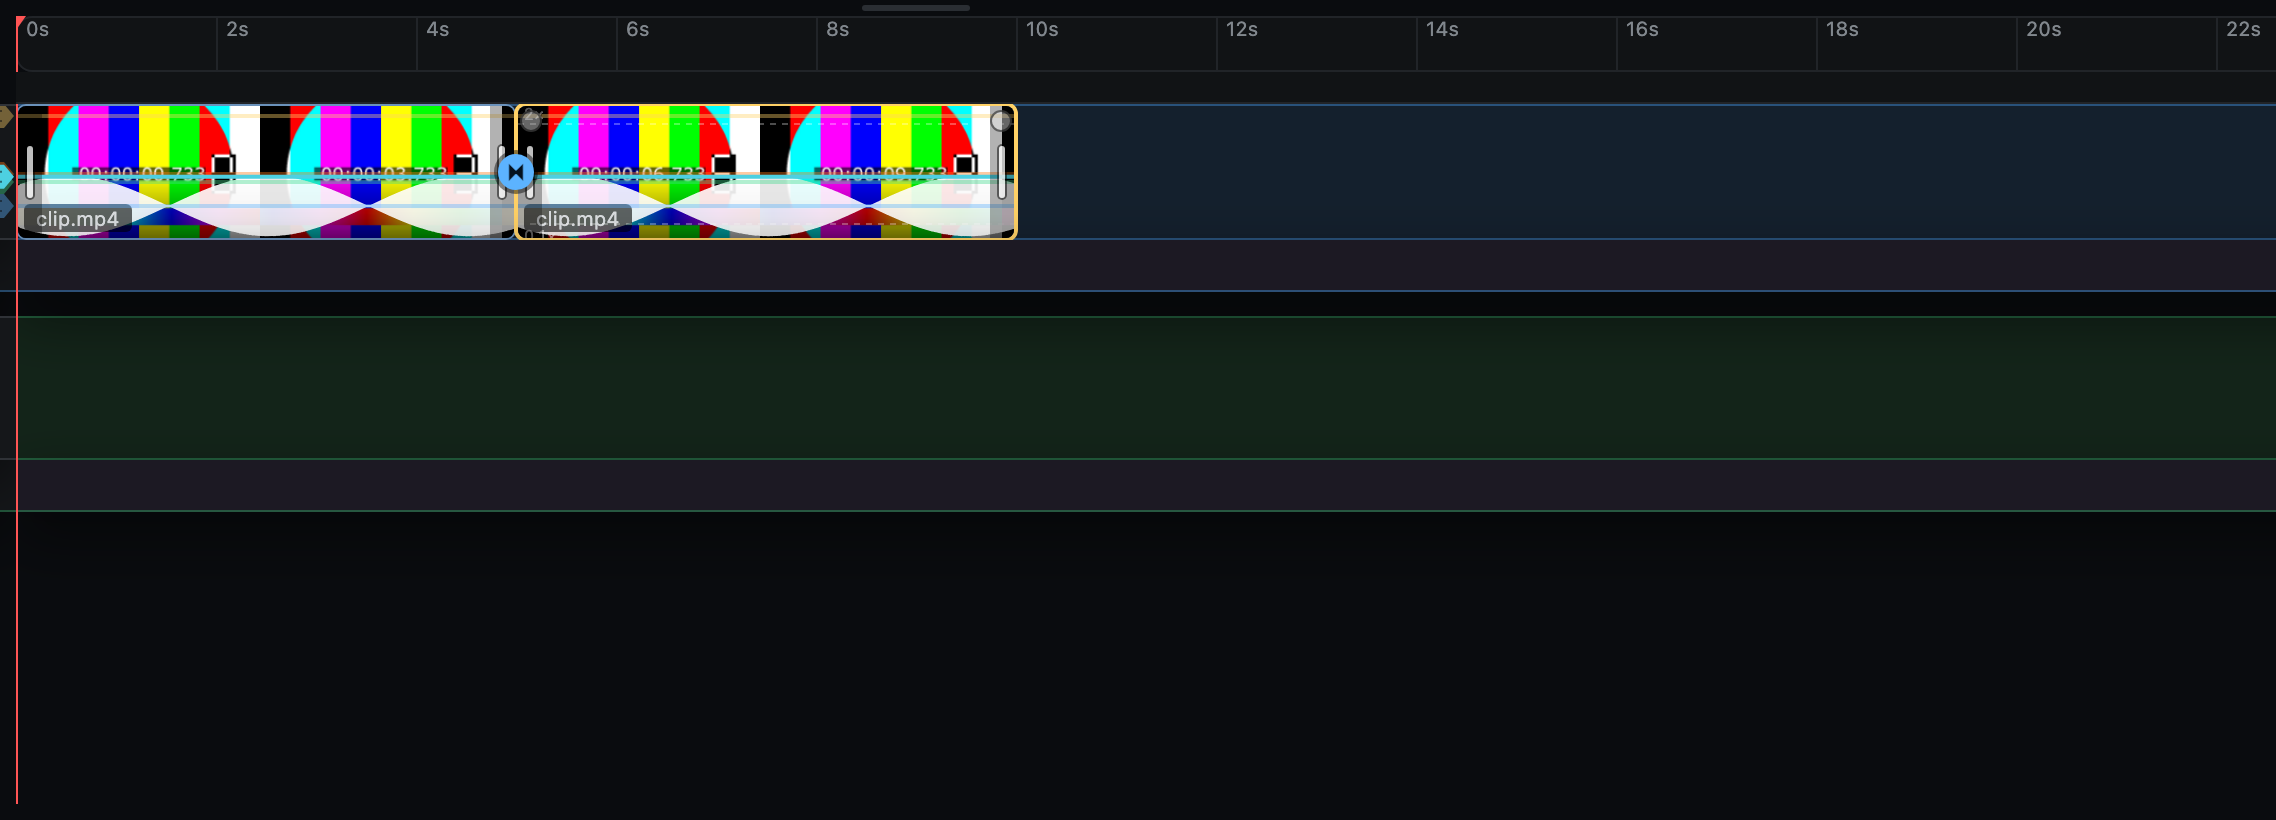
- Place two clips next to each other.
- Select the transition point between them: the small gap drawn between the two clips, whose centre is the cut. On a computer, point at it and click the +; on a phone, hold or double-tap the faint dissolve mark (tap it once to open one already there).
- Choose a transition, then set its duration and options.
A transition shows as a blue chip in that gap, drawn with its style; click it to change the style or length. Clips separated by a real gap are drawn further apart, on plain track, and the + closes the gap with a transition. When the timeline is zoomed far out the gap is not drawn and clip edges only trim.
Transitions use media outside each visible trim when available. If a transition cannot be lengthened, trim both clips inward to create handles.
Between two tracks
Stop the playhead where clips on two different tracks overlap, with nothing selected or with one of those two clips selected, and the Two clips card opens. The clip beneath is tagged A and the clip on top B, on the timeline and on the card's top line, which reads in the direction of the transition. A + sits between the two tracks wherever the picture changes from one to the other: where B starts over A (A → B) and where B ends while A carries on (B → A, the return). A clip that starts or ends together with the one beneath gets no + at that end. Use the swap button at the end of the top line to reverse a transition, and the Pair menu when three or more clips overlap. The last row of the card is Transition: it shows the transition under the playhead, or none. Turning it on adds a 1-second Cross-dissolve at the playhead (a group bar on the Groups rail); each + does the same against its own end. It plays, and the transition panel opens beneath the row to pick another style and length (or All for the whole overlap). Turning it off removes that transition and its group bar; ⌘Z brings it back. To reopen the panel on an existing transition without removing it, select its bar on the Groups rail. While the panel is open it stays in the inspector wherever the playhead goes, and after a style's preview plays the playhead returns to the start of the transition; press Esc, click any clip, or click empty timeline to let it go. The transition's group bar can be dragged to fine-tune it. The card opens by itself on a computer only; on a phone, Two clips is offered in the bottom bar while the playhead is over the overlap, and the + turns the transition on or off the same way (tap any clip or close the card to let the panel go).
Filters
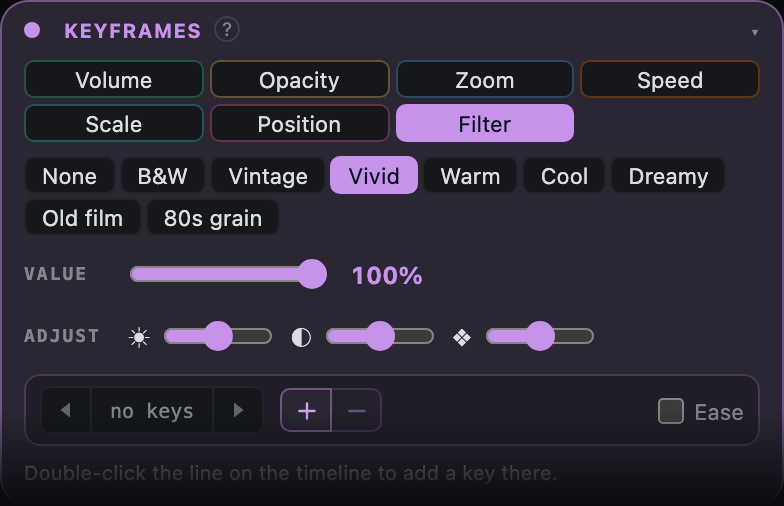
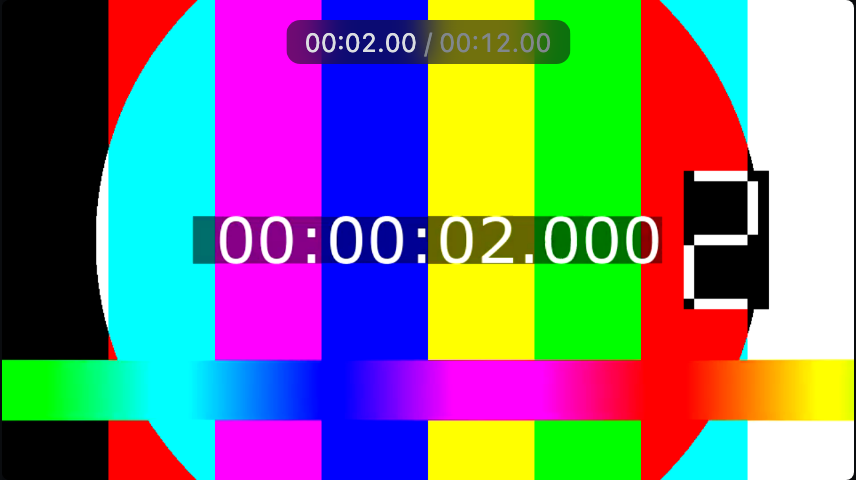
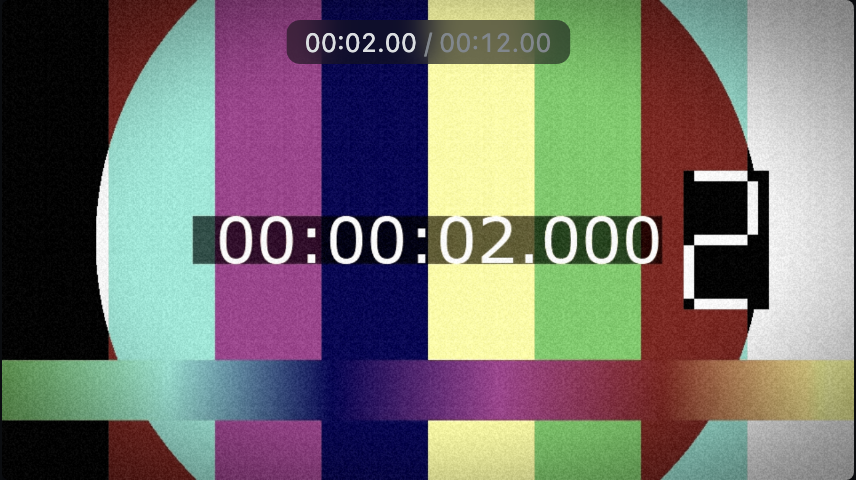
Select a clip, open Filters, and choose a look. Adjust Amount to mix it with the original. Stack only the filters you need; order can change the result.
| Use | Start with |
|---|---|
| Fix exposure or color | Basic adjustments before a stylized filter. |
| Match two clips | Exposure, temperature, tint, and saturation. |
| Animate a look | Add keyframes to supported filter values. |
| Remove a filter | Choose the None preview, the first of the looks. On a filter with keyframes, use Remove filter in the channel's options. |

Camera shake
Select a video clip, open Position in the keyframes card, and turn on Handheld (a drifting camera) or Impact (one hard jolt). Each adds one bar on the Groups rail: stretch it to change how long it shakes, remove it to take the shake out. The slider sets how hard it shakes. The dots beside the slider are what the shake wrote: tap the yellow dot to select its bar on the Groups rail, or a channel's dot to switch the card to that channel. The ringed dot is the channel you are on.
Stabilize
Select a shaky video clip, open Position in the keyframes card, and turn on Stabilize. It reads the whole clip once to measure how the camera shook, which takes a moment; the tile shows how far it has got. Then it writes position keys that move the picture against the shake, and one scale that zooms in just enough to keep the moving edges out of the frame.
Deliberate movement stays: a pan, a slow drift or a walk is kept, and only the quick wobble on top of it is taken out. The slider sets how much of the wobble goes, from none to all of it, and the tile shows what that costs, such as 100% · +6% zoom. It never zooms in more than 11%; a very rough shot is steadied as far as that allows.
It covers the whole clip with one bar on the Groups rail. Turning it off puts every key back as it was, including position and scale keys you set by hand. Text or shapes following the shot on this clip are tracked again so they stay on the steadied picture.
Stabilize and Handheld or Impact cannot be on the same clip at once, because one adds shake and the other takes it out. Turn one off to use the other.
Blur & mosaic
- Select the clip and add Blur or Mosaic.
- Position and size the mask over the subject.
- Adjust softness or block size.
- Use keyframes when the subject moves.
Follow the shot (motion tracking)
Follow the shot makes a shape, a piece of text, an image or a picture-in-picture video travel with whatever is under it, so a blur stays over a face and a caption stays with the person it names. Select the clip, open Keyframes, choose the Position channel, and turn on Follow the shot, a tile in the card's automation row. An image or video offers it when another video runs underneath it.
- Move the playhead to any frame of the clip where you can see the thing to follow.
- Drag the item on the preview to where you want it on that frame—over the face to hide, or beside the person a caption names.
- Turn on Follow the shot and wait for it to finish. The row reports how many keyframes it wrote.
Where you put it is what it follows. There is no separate target to set. Whatever sits under the middle of the item on that frame—a colour, a texture, a face, a logo—is what gets followed, and the item keeps exactly the spot you gave it. It is never pulled onto a face or anything else nearby: a caption placed below a face stays below that face, and a box placed on someone's cheek stays on the cheek.
It covers the whole clip. The playhead only chooses which frame you place the item on. Tracking runs from that frame back to the start of the clip and on to its end, so placing it halfway through still moves it from the very first frame to the last.
Moving a tracked item tracks it again. Drag it somewhere else on the preview and the whole path moves with it straight away; when you let go, the clip is followed again from the new spot, across its whole length. One ⌘Z puts back both the old spot and the old path.
A small swatch in the middle of the item's box on the preview shows the colour under that spot—what is being followed. It pulses while tracking runs. The colour is a label, not the method: matching works on the pattern of light and dark rather than on hue, which is what lets it hold through shadow and a change of light. When the spot is on a face, the face is recognised several times a second and used to keep the item at its place on that face as the head turns or walks.
The result is ordinary Position keyframes. Nudge any of them by hand afterwards. Handheld or Impact on the same clip keeps its shake and rides along with the track. Turning the switch off removes only the tracking, and leaves any shake as it was.
If it loses what it was following—the subject leaves the frame, or the shot cuts, before or after the frame you placed it on—a shape, text or image is shortened to the stretch where it still had it, at either end, and the row says which seconds those were. A video keeps its length and holds still outside that stretch instead. A brief pass behind something does not count: it coasts through short interruptions. Press ⌘Z to put the length back.
Tracking needs footage underneath: it reads the video under the middle of the item on the frame you placed it on, and a still image has nothing to follow.
Green screen (chroma key)
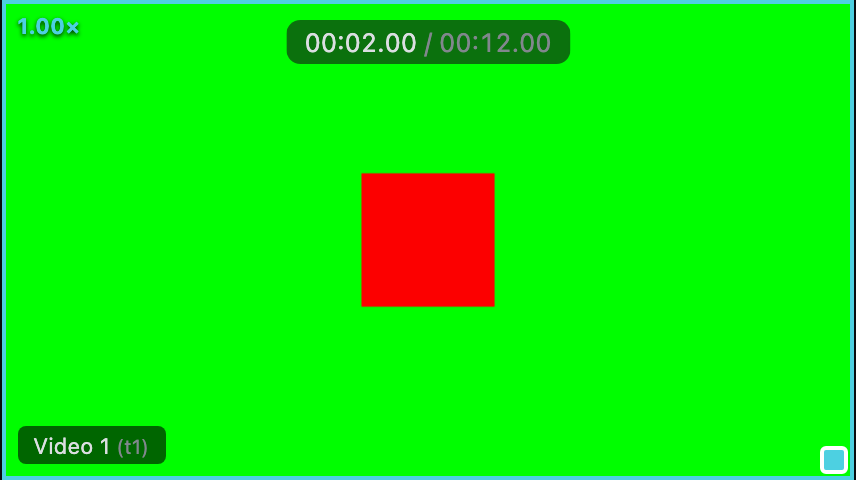
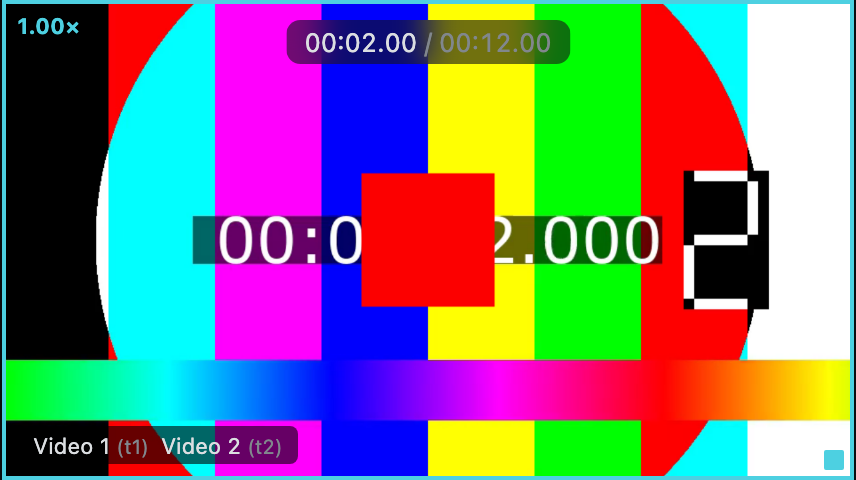
- Place the replacement background on a lower video track.
- Place the green-screen clip above it.
- Select the top clip and enable Green screen.
- Pick the screen color, then adjust tolerance, edge softness, and spill.
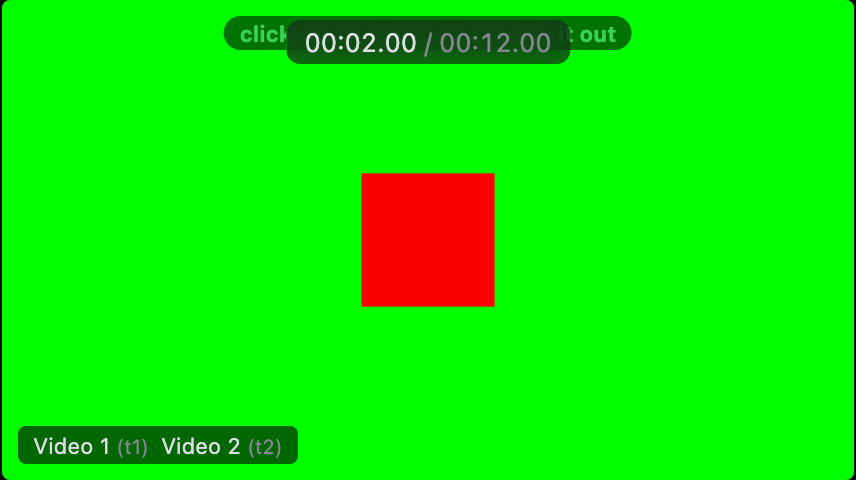
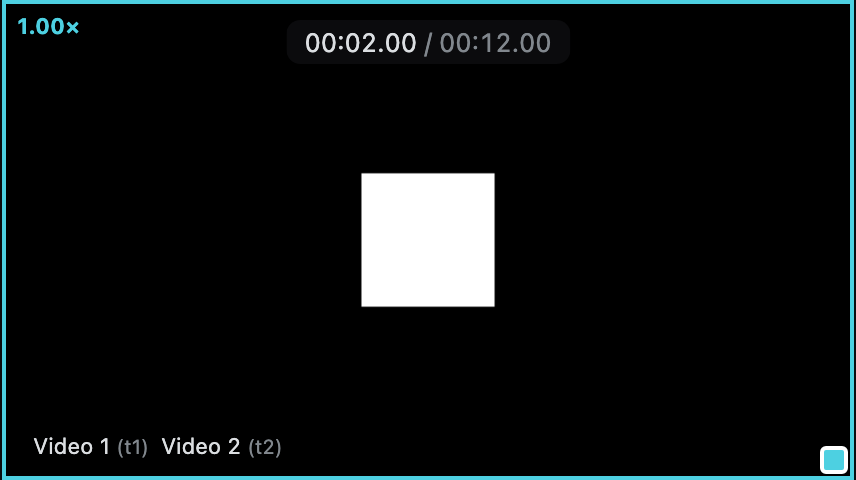
Use the lowest tolerance that removes the screen. Increase spill reduction only enough to remove colored edges.
On a phone the Green screen card is two rows: its name, the key colour (tap it for the eyedropper), Matte and the on/off switch; then three short sliders, each ending in its value — ≈ similarity, ◠ softness and ✦ spill.
Picture-in-picture
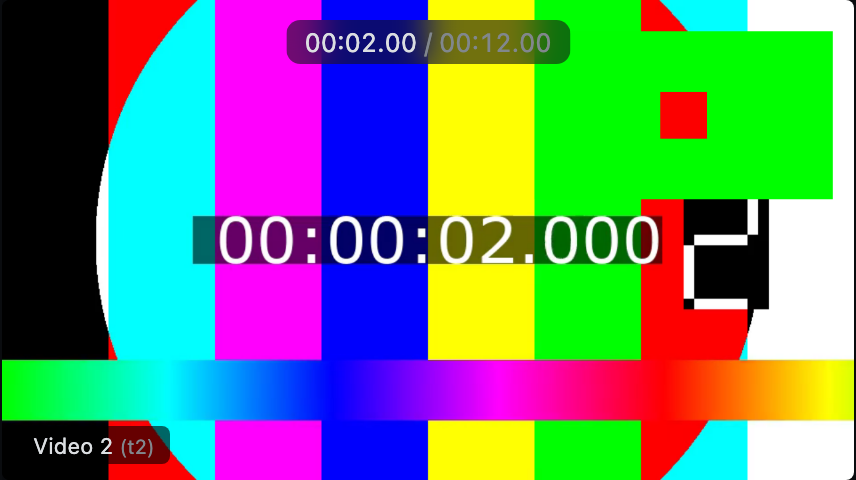
- Put the inset clip on a track above the main clip.
- Select it, resize it in the preview, and drag it into position.
- Use crop, corner radius, border, or shadow as needed.
Keyframe position and scale to animate the inset.
Portrait to landscape (wide fill)
Select a portrait clip in a landscape project and choose Wide fill. The original stays sharp in front while a fitted or blurred copy fills the sides. Adjust blur, scale, and framing in the inspector.
Two-clip effects
Two-clip effects combine overlapping clips.
- Place the foreground clip above the background clip.
- Overlap them for the duration of the effect.
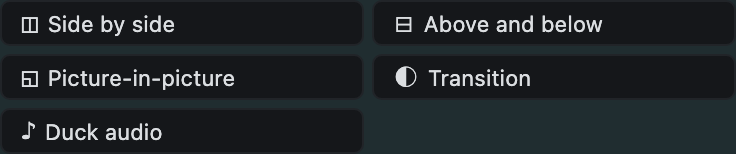
- Select both clips, or stop the playhead over their overlap. A and B are named at the top of the Two clips card; use its swap button to change which is which.
- Click an effect to turn it on in that A → B order, and again to turn it off. Transition, the last row, opens the transition panel beneath it; turning it off removes the transition.
The card shows the effects under the playhead. Move past one and its button is off again; turning it on there adds another group at the playhead, so an overlap can hold several. Swapping A and B at the top flips the effects under the playhead, keeping each group and its timing, in one undo step. Off removes that group and its generated keyframes. Duck audio stays an on/off toggle and lowers both selected clips together.
Side by side and Above and below start with the first clip in front, hold both pictures, then bring the second forward before zooming back in. The second clip stays on screen afterward. Picture-in-picture shrinks the first clip into a corner over the second; the inset fades away at the end. With one of these three under the playhead, the swap becomes a direction menu: A → B, B → A, or A → A and B → B, which open from a clip and close back to it. Wide fill keeps the chosen foreground clip above its fill background throughout the group.
Align audio moves A to match B’s sound; swapping A and B re-aligns the other way. Off reverses the alignment move. For a dissolve, turn on Transition and pick Cross-dissolve. Older projects may still hold a Cross-fade group; it keeps playing and can be removed from its bar on the Groups rail.
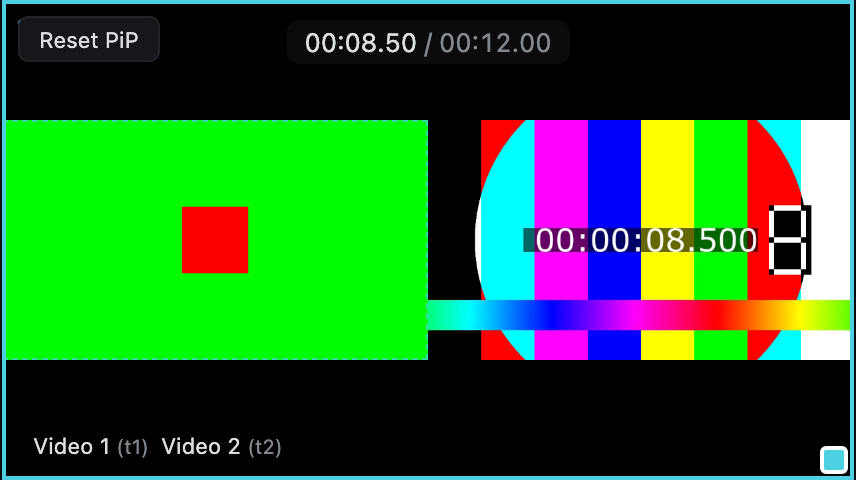
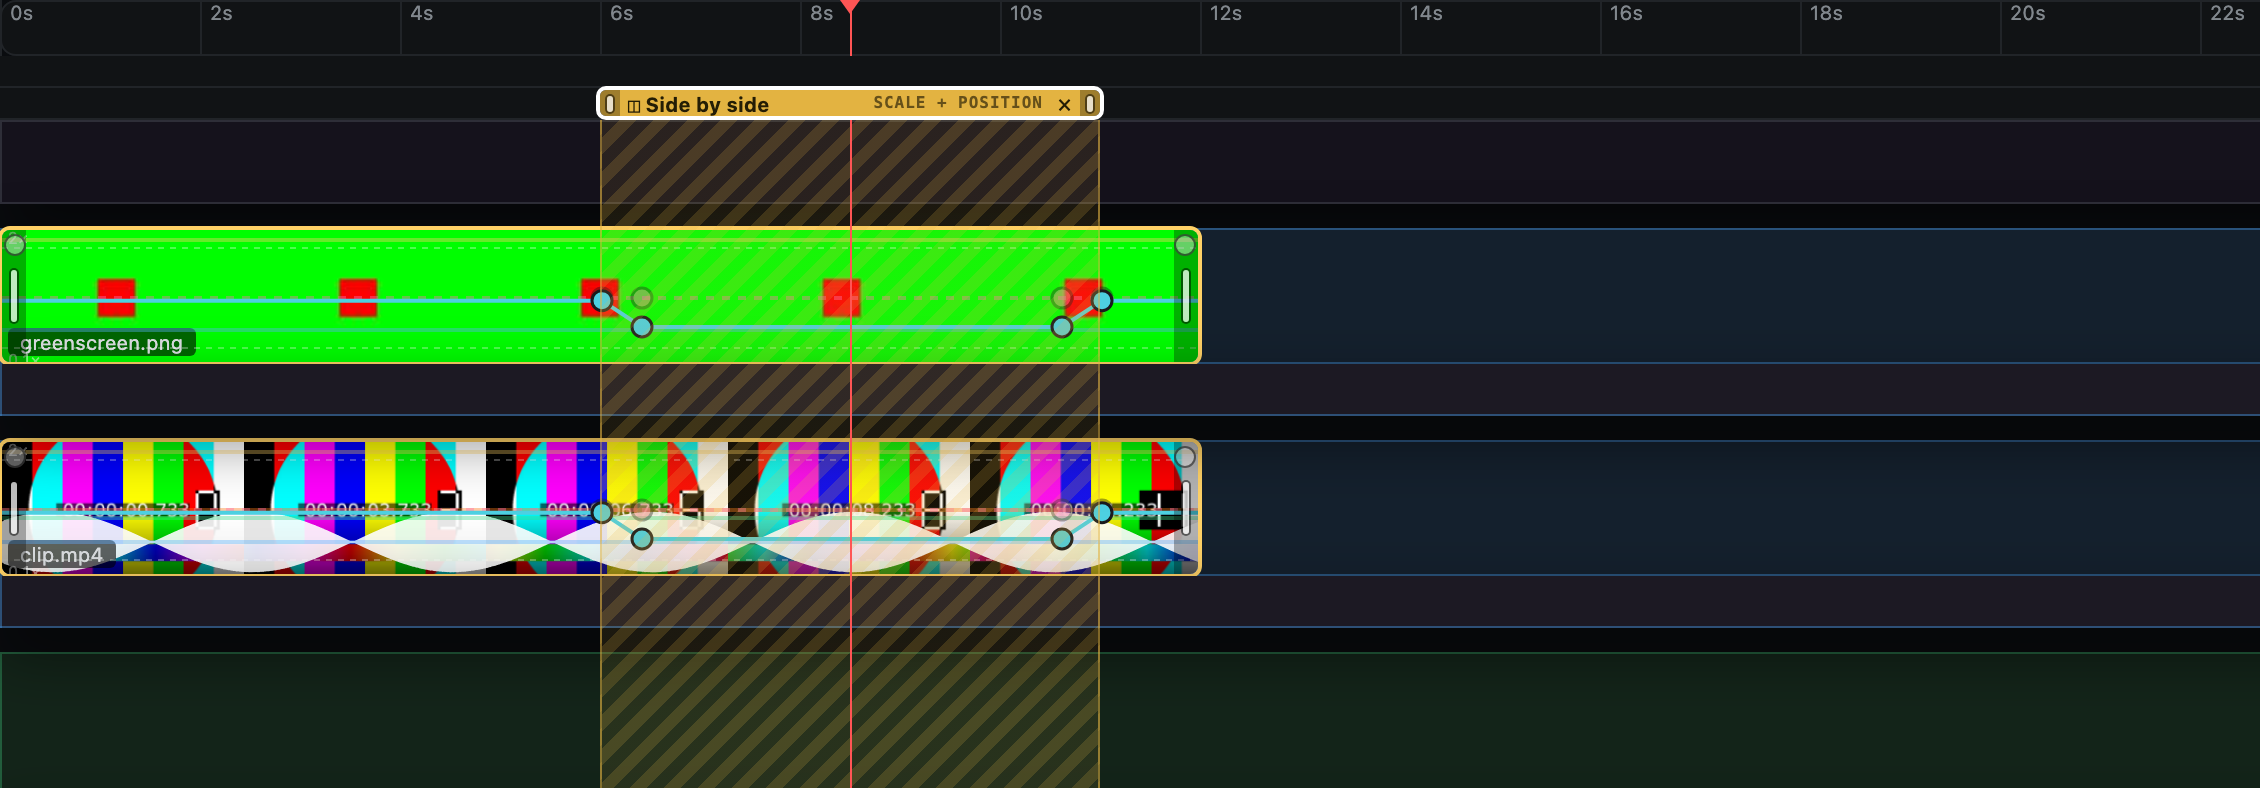
If the effect appears blank, check that both clips overlap and both video tracks are visible.
Multicam switcher
- Select clips recorded at the same time.
- Choose Create multicam and select the sync method.
- Play the sequence and select camera angles in the switcher.
- Fine-tune each cut on the timeline.
| Sync method | Use when |
|---|---|
| Audio | Every camera recorded the same event sound. |
| Timecode | The cameras share matching timecode. |
| Manual | You need to align a clap, flash, or other visible point yourself. |

Titles
Select Titles, choose a style, and drag it to the timeline. Select the title clip to edit its text, font, color, alignment, position, background, and animation. Trim its edges to change how long it stays onscreen.
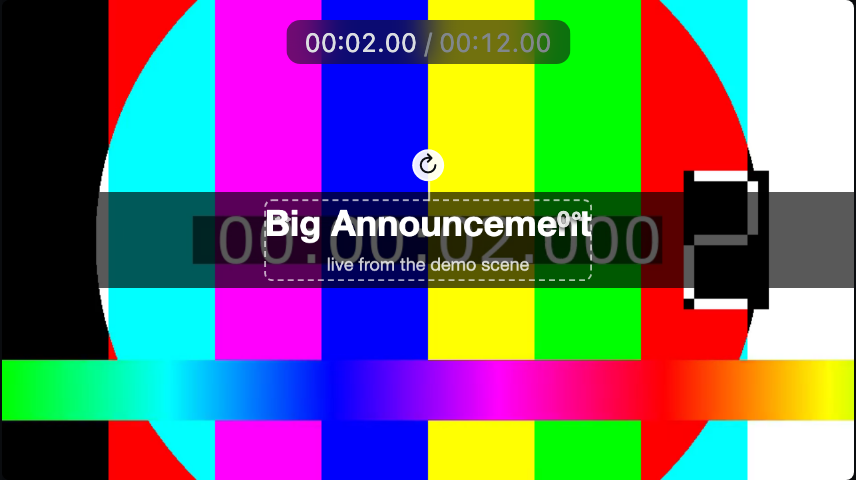
To make a caption travel with a moving subject instead of staying put, use Follow the shot on the title's Position channel.
Transcription

- Select a clip with speech and choose Transcribe.
- Choose the language or use automatic detection.
- Edit words in the transcript, then create captions or use text-based editing.
Correct names before generating captions. Transcript edits change text; timeline edits change the media.
Cloud sync
Cloud sync is not a backup. It is for sharing and for editing and exporting on your other devices. Cloud copies can be cleared, so keep your own files.
| Control | What it does |
|---|---|
| Sync | Saves project changes to your account. |
| Sync Source | Uploads original media when source sync is enabled. Another device downloads an original when it exports, when you press Download original, or in the background once its preview copies are all here. |
| Downloaded originals | File menu, under Browser storage: their total size and Remove. One that no project on this device uses, or that no project has opened for 14 days, is deleted by itself. Files that are only on this device are never touched. |
| Versions | Opens saved project versions for review or restore. |
| Share | Creates access for collaborators or reviewers. |
Plans
| Free | Pro | |
|---|---|---|
| Projects | 10 | Plan limit shown in the app |
| Saved versions | 75 per project | 5,000 per project |
| Projects carrying footage | 1 at a time | All of them |
| Preview-copy storage | 300 MB (500 MB for accounts made before 18 September 2026) | 50 GB |
| Preview copies cleared when unused | After 14 days without use | Not on a timer |
| Original files | — | Included |
| Editors | 2 | 3 |
| Comments | Unlimited | Unlimited |
| People who can watch | 200 per project, 500 per account | Same |
Reviewers and commenters are free and unlimited on every plan, up to a ceiling of 200 people on one project and 500 across the account. That is not something Pro lifts — it is the same on both plans — and it sits far past any real review; it is there so a project cannot quietly become a way of handing a video to a very large number of people. If you genuinely need more, ask and it can be raised on your account.
Which project carries its footage
Every project you own syncs with its version history, on any plan. What is rationed on the free plan is the footage: one project at a time keeps its preview copies in the cloud, which is what makes that project open ready to play on your phone or your other computer.
On a device without the original, a file's sound comes with its preview copy. Its item reads Audio on the way until the copy arrives, and Original not here if no copy is coming.
Turn on Sync preview copies by default to send new footage automatically, or leave it off and push one file at a time with its own button next to it in Sync Source — the default only decides whether it happens without asking. Either way, if another project is already using the slot you are told which one, and switching is free — turn it off there and on here. The only cost is the time it takes to upload again. On Pro every project carries its footage at once and there is nothing to switch.
Both defaults are for your whole account (the checkbox says All projects). Ticking one in any project turns it on for every project you have not set yourself, and for every new project, on all your devices. A project where you switched it off, or turned a single file on or off, keeps its own setting. Unticking stops new syncing; it removes nothing already in the cloud. New accounts start with preview copies on (free: one project at a time) and, on Pro, originals on.
The first time you add a file under 200 MB to a project that is not already syncing, Nekocut asks once whether to turn this on — Yes, store them flips the same switch above. Answer it either way and it will not ask again.
A small file — already sharp and small enough that a smaller copy would not help — is marked Not proxied instead of building one, and sends its own bytes when this project is syncing footage. It plays and exports normally on another device with nothing to relink.
The slot goes to the project that has footage in the cloud, not to the project with the box ticked. Pushing a single file by hand takes the slot just as the switch does, so a project you have never ticked can be the one holding it — and the screen names it either way.
When the slot moves, the old project's copies are taken down — but not straight away. You get about four hours, and Sync Source prints the exact time. Until then nothing has changed: the copies are still stored, still counted against your allowance, and still played by every device that was using them, so a phone in the middle of an edit notices nothing. Turning that project's footage back on inside the window cancels it completely. After the time has passed the copies come out of the cloud and the room is yours again. Your own files are never touched — preview copies are small stand-ins the editor rebuilds from the footage on your disk.
If a Pro plan ends while several projects are carrying footage, the one you used most recently keeps the slot and the others are scheduled the same way, with the same few hours and the same way out.
A project whose copies have already been taken down says so when you open it on another machine — it names the project that has the slot now, rather than asking you to go hunting for a file that never moved.
To see everything in the cloud, press the allowance line at the top of Sync Source (it ends in an arrow). Everything in the cloud lists every synced file on your account by project, with sizes and the total against your allowance. On the free plan the project holding the slot is marked Free slot. Pressing Synced removes that copy from the cloud and frees the room; files on your devices are not touched. Files in the open project can be sent from here with Upload; other projects' files read Not synced until you open that project and send them. A file this device does not have reads Not on device.
If an upload stops, what already went up is kept. The pill reads Retrying in 15s (then 1m, 3m, 6m, 10m) and carries on by itself, and again when you come back online. Paused — resume means it has stopped trying; press it to carry on from where it stopped. Pressing either never turns the file off. A refusal says why instead — No room, Pro only, Slot taken — and has nothing to retry.
Original files are Pro. Preview copies are small stand-ins the editor builds anyway, and they are enough to play, cut, retime and comment. The originals are the whole files and are what an export reads, so they stay on your disk unless you are on Pro. Turn on Sync original files by default to send new footage automatically, or leave it off and push one file at a time with its own button next to it in Sync Source, the same way preview copies do.
Free preview copies are cleared after 14 days without use. After 12 days in which you have not opened Nekocut while signed in, we email you, and 2 days after that the preview copies come out of the cloud — free accounts only. Opening the app and signing in before then stops it. It does not touch your projects, edits, saved versions, or the footage on your own machine, and opening a project builds its preview copies again from that footage. Sync Source says the rule under your storage.
Sharing turns this on for you. A link, or an editor or reviewer added by email, needs your footage in the cloud — otherwise they would open an empty timeline — so creating a link or sending an invitation switches preview copies on for this project automatically, on any plan. On the free plan, if another project already holds the one live slot, you are asked to confirm moving it here before the link or invitation is created; agreeing takes that project's copies down on the same four-hour schedule as switching it off by hand.
Paying, and stopping
Open your account ▸ Plan and press Get Pro. Payment is handled by Stripe on their own pages; card details are never entered into this app and never reach it. The plan changes when Stripe confirms the payment, which is usually a second or two after you are sent back — the page keeps checking, so there is nothing to reload.
Once you are on Pro the same button becomes Manage billing and opens Stripe's portal, where you can change the card, read every invoice, and cancel. Cancelling leaves you on Pro until the end of the period you have already paid for, and the plan page shows that date.
In the iPhone app, Pro is bought from Apple. The App Store takes the payment, names the price on its own sheet, and the plan starts when Apple confirms it. Cancelling, changing the card and reading receipts all happen in Settings ▸ your name ▸ Subscriptions on the device: an App Store subscription cannot be cancelled by Nekocut or by Stripe's portal, so the plan page's button becomes Manage in App Store and takes you to the one place that can. Restore purchases, on the same page, brings back a subscription bought on another device or before a reinstall — nothing is paid twice for.
If you have paid both ways — on the web and then in the app — both charges are real and the plan page says so. Pro stays on while either one is live, so cancelling the one you do not want changes nothing about your account.
Ending a subscription does not delete your projects, edits or saved versions, or touch the footage on your machine. The account returns to the free limits: the project you used most recently keeps its footage in the cloud, and the other projects' copies come out of the cloud after about four hours, the same as moving the free slot by hand. If a payment fails, Stripe retries for several days and emails you, and the account stays on Pro throughout — a card that expired is not treated as a decision to leave.
Going over the allowance
You are always asked, and nothing is ever charged without you pressing a button that names the amount.
On the free plan, sending a copy that would pass your free allowance offers you Pro, starting now: $10 is charged today and $10 a month after that, you get 50 GB and every project carries its footage at once, and your copy goes up as soon as the payment goes through. You can cancel from your account page whenever you like. If you would rather not, take copies back out in Everything in the cloud and nothing is charged.
On Pro, sending a copy that would pass your allowance offers 100 GB more for $6, charged today and added to your monthly bill, on the card already on file. The allowance goes up the moment the payment lands and the copy goes up with it. Blocks are billed for the month — taking copies back down later does not refund the block you are in.
Sharing roles
| Role | Access |
|---|---|
| Owner | Edits, shares, restores, and manages the project. |
| Editor | Edits the project. |
| Reviewer | Views and comments without changing the edit. |
- Creating a link or inviting someone by email turns on preview-copy sync for this project, so they can see the cut.
- Inviting someone by email sends them a link that opens the project directly. It works only for the invited address: they sign in with it (which creates an account if they have none) and land in the project, and a forwarded copy of the email opens nothing for anyone else. The project also appears under Shared with me in their project list.
- Project versions save the edit; source sync stores the original media.
- A shared project may still need its source files unless the originals were synced.
- Restoring a version creates a new current state; it does not erase version history.
- Signing in with a different account backs the project up under that account as a new project. The versions it saved under the previous account stay with that account and are reached by signing back into it.
Let Claude Code drive it Pro
- Open the agent panel in Nekocut and create an access key.
- Choose how long it may sit unused: 1, 7, or 30 days. Using the key pushes that back, so one you work with does not expire.
- Run this command, replacing the placeholder with the key:
claude mcp add --scope user --transport http neko https://nekocut.com/api/cloud/mcp --header "Authorization: Bearer neko_YOUR-KEY"Then ask Claude Code to inspect or edit the open project.
| Permission | Allows |
|---|---|
| Read | Inspect projects, timelines, and clip settings. |
| Edit | Change the edit. |
| Files | Work with project media. |
| Revisions | Read version history. |
| Restore | Restore a saved version. |
| Export | Start an export. |
| Transcribe | Create transcripts. |
- Keys are shown once. Store them like passwords and revoke unused keys.
- You can keep up to 10 active keys.
- The service limit is 5,000 agent commands per day.
Export
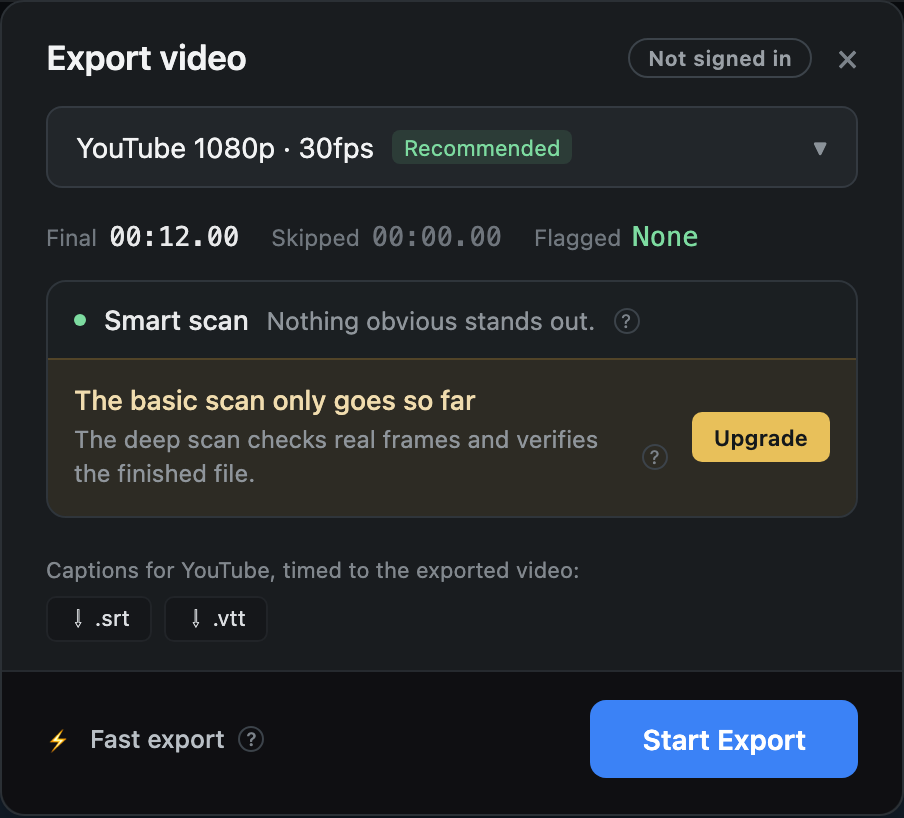
- Select Export.
- Choose resolution, frame rate, and quality.
- Start the export and keep the tab open until the file is ready.
| Setting | Notes |
|---|---|
| Format | H.264 video with AAC audio. |
| Free | Up to a 1080p-sized frame, including portrait 1080 × 1920. Footage above 1080p exports at 1080p, and the dialog says the size it will write. |
| Pro | Footage above 1080p (1440p, 4K, landscape or portrait) also exports at its own size: Match footage, up to 3840 on the longest side, at 24/30 or 60 fps to suit the footage. Nothing is scaled up: footage at 1080p or below adds no larger size on any plan. |
| Match footage | On a computer only; a phone or tablet exports at 1080p. If the browser can’t encode the size, the dialog says so before the export starts and offers 1080p. |
| Browser | Chrome and Edge usually export fastest. Other browsers may use real-time export. |
| Media | All original source files must be available. Preview copies cannot be used for final export. |
| Synced originals | On a device with only preview copies, Export offers to download the synced originals first, with their size, a time estimate and a free-space check. A cancelled or interrupted download resumes where it stopped. Originals that were never synced are listed by name. |
| Phone | The file is written to device storage as it exports, then Save video opens the share sheet (Save Video puts it in Photos). In Safari, files over 256 MB are offered as a Download instead. |
If export stops, reconnect missing media, free device storage, close memory-heavy tabs, and try again with the browser kept in the foreground.
Back to top